If you like Japanese food, and sushi in particular, you owe it to yourself to eat occasionally at
proper sushi restaurants. Yes, Sushi Tei, Sakae and Itacho can be good to satisfy a craving on the cheap, but it's a far cry from what you can get from a Chef who's dedicated his entire life in the pursuit of fish-on-vinegared-rice perfection. In Singapore we do have quite a number of such restaurants; the best of which is probably Chef Kanesaka's
Shinji by Kanesaka at Raffles Hotel. According to San Pellegrino & Acqua Panna's
Asia's 50 best restaurants list, it's the best sushi restaurant in Asia (outside of Japan)!
Like many other fine dining restaurants, lunch is cheaper than dinner, with the starter/budget 9-piece Hana 花 option priced at $75. Is it worth the price tag? Let's find out!
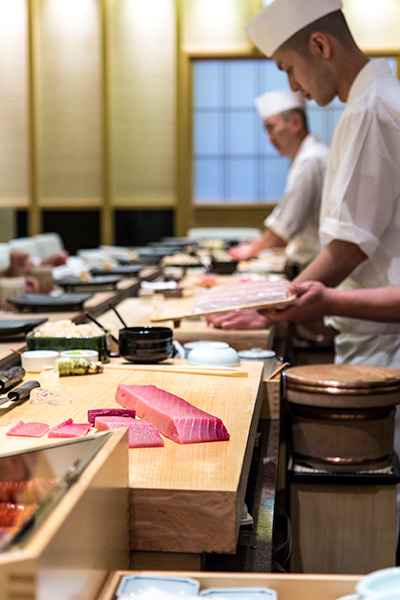
Shinji by Kanesaka
Upon arrival we're ushered to our seats at the counter and we immediately draw favourable comparisons to another top sushi restaurant in Singapore - Les Amis Group's
Aoki, which we
visited about a month ago. Shinji by Kanesaka is a much more jovial place to eat in. The waitresses and chefs are far friendlier and as a result there's a lot more communication across the counter. And most importantly - even though we're on the cheapest menu option, each piece of sushi is formed and served one at a time - very important for a good sushi eating experience.
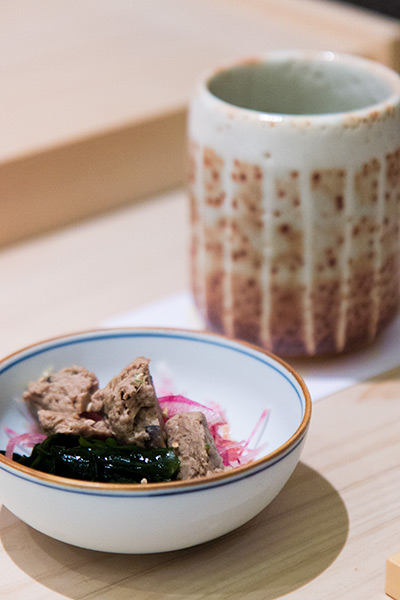
Appetizer - Tuna with pickled turnip & Seaweed
As is standard for restaurants of this calibre, you don't get to choose your sushi. The Chef may ask if you have any particular dislikes or allergies, but other than that you're at the mercy of whatever Master Chef
Koichiro Oshino decides to serve. Or perhaps more accurately whatever his boss Chef Kanesaka over in Tokyo has deemed as the best fish and seafood for the day/season during their morning shopping sessions at the Tsukiji Fish Market. So all there is to do after ordering is to just sit back and wait :)

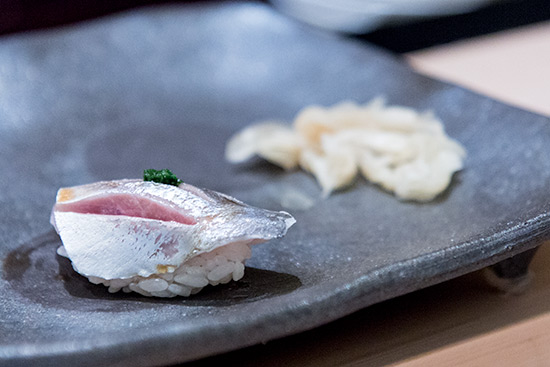
Sawara (Spanish Mackerel)
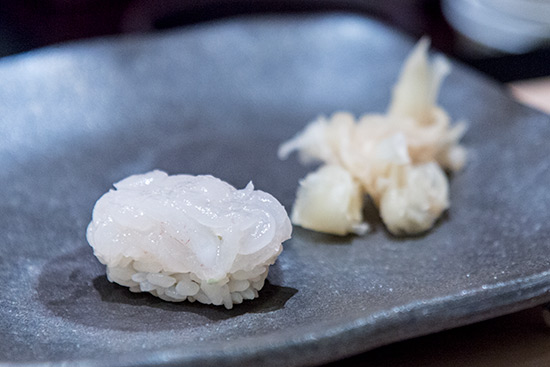
Baby Shrimp
The appetizer that we got - chunks of tuna meat with pickled turnip and seaweed/kelp - was perhaps a little underwhelming. Nothing to fault taste-wise but not exactly particularly exciting, either. The sushi, however, was a different story entirely.
What we liked most about the sushi here is the
shari (sushi rice). It comes at the perfect temperature, and is packed
just tightly enough to hold it's shape from plate to mouth. Once the chewing starts the rice breaks apart, allowing you to taste and feel every single seasoned, slightly sweet, vinegared grain. Bliss.

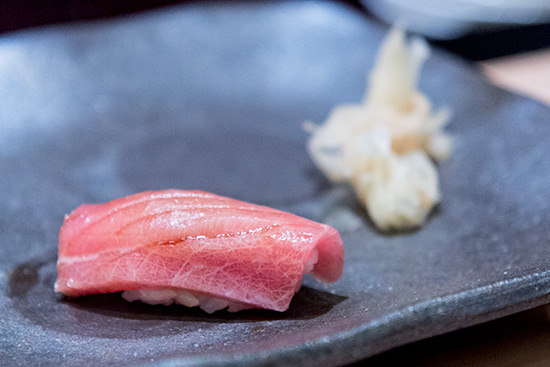
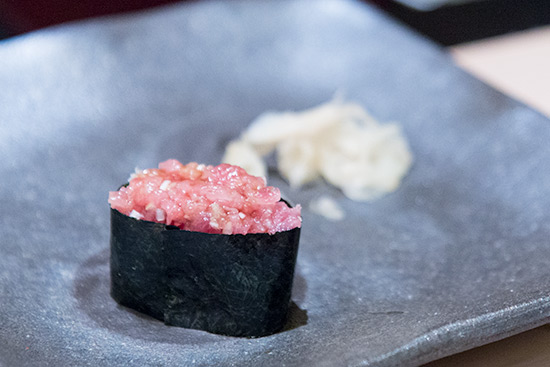
Chu Toro (Medium Fatty Tuna)
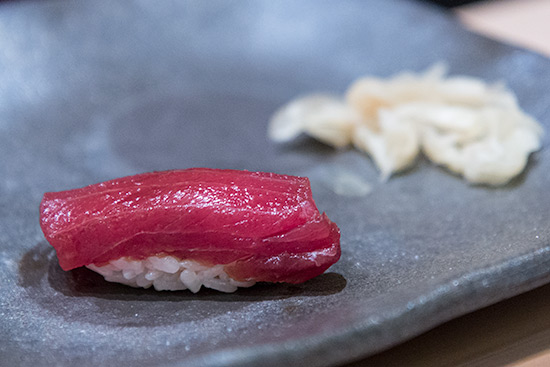
Shimofuri O-toro
Similar to how there are huge differences in normal, every day beef and the best Wagyu or USDA Prime, likewise there are huge differences between different Tuna. Top Chefs will have the necessary money and decades-old relationships to get the best fish from the market - and by extension, the best slabs of Tuna Belly. Shinji by Kanesaka's ChuToro is sublime, with the best balance between flavor from the meat and oily richness from the fats, and with not even the slightest hint of tendon.
The Shimofuri O-Toro is so named because of the intricate marbling patterns that makes it look like Wagyu, and was equally heavenly.
Aji (Horse Mackerel)
Akami (Tuna)

Six month old Baby Tuna
After these seven pieces of Sushi, we get a slight 'breather' in the form of Yuzu Marinated Ikura (Salmon Roe) on Rice. Most Ikura you eat at chain restaurants tend to be salty first and foremost. Not this Ikura. The saltiness is delicate rather than overpowering, and is tempered perfectly by the citrus from the Yuzu. Genius combination - all other Japanese restaurants should do this.
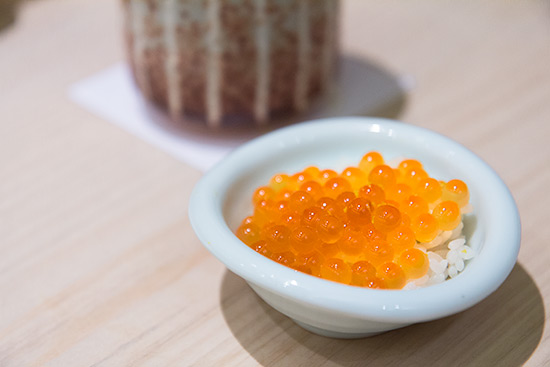
Yuzu Marinated Ikura (Salmon Roe) on Rice

Kuruma Ebi (Tiger Prawn)
Negitoro (Minced Tuna Belly)

Unagi Two Ways
The sushi journey then resumes with Tiger Prawn, Negitoro and Unagi
nigiri. We thought it was a nice touch that Chef Koichiro cut the Tiger Prawn sushi for the
darling as it would have been too big for her to eat in one bite. The unagi was interesting - we each got a 'traditional' sauce'ed up unagi, and a plain unagi with just a pinch of salt, which allowed for the flavors of the eel to take centre stage.
If you've been keeping count, we're actually already at ten
nigiri plus an Ikura bowl so far. Didn't we order the 9-piece set? At this point we were hoping the waitress hadn't perhaps mixed up our orders ...
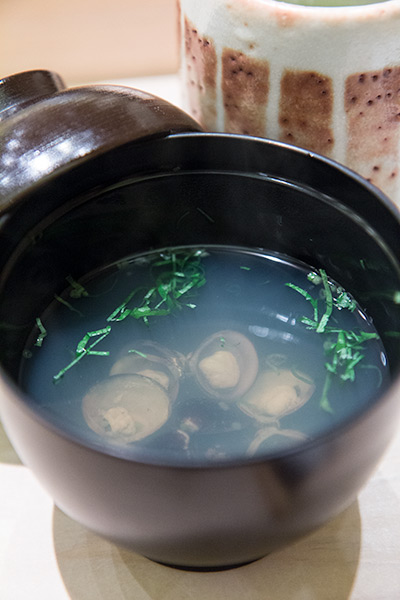
Clear Clam Soup
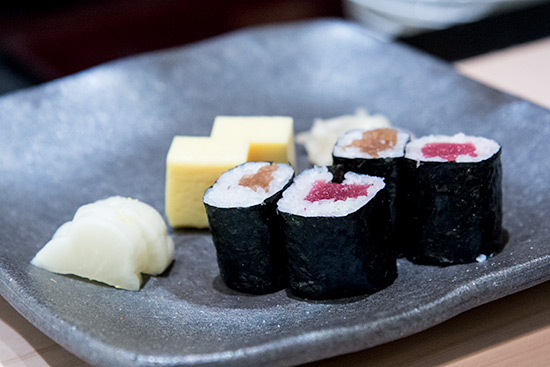
Akami and Negitoro Maki with Egg Custard Cake
A bowl of clear soup with mini clams is served to warm up the tummy followed by negitoro and akami maki, and two pieces of egg ...
custard. The texture of the egg cake here is unlike any we've ever tried - it's silky smooth and has the consistency of a jelly. It's interestingly good. Normally we find it hard to get excited about the 'tummy filler' maki, but this one is delicious, in large part due to that superb rice.
The lunch set finishes off with a pumpkin pudding - essentially a creme brulee-based custard with sweet pumpkin puree. Delicious.
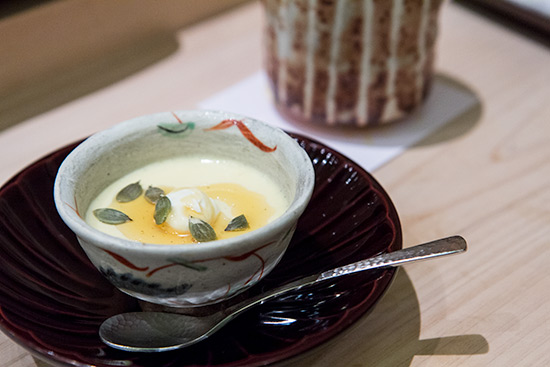
Pumpkin Pudding
Verdict? Well, we haven't had the opportunity to sample any of the top ¥30,000 places in Tokyo, but otherwise this lunch simply blew us away, and is quite simply the best sushi meal we've ever eaten - even better than Tsukiji Market's
Sushi Dai and
Daiwa Sushi. We also feel that $75 is ridiculously good value when you consider the calibre of the chefs, the quality (and quantity) of the meal and that all the fish is flown in from Tokyo daily. Definitely extremely highly recommended.
Shinji by Kanesaka is at Raffles Hotel and is open from Mondays to Saturdays for Lunch and Dinner: Reservations highly reccomended: Telephone +65 6338 6131 or Email reservations@shinjibykanesaka.com
(We also had the $250
omakase shin for lunch, which adds on sashimi, cooked dishes and musk melon - we'll be reviewing that in a separate post as the huge price tag makes it a different value proposition)