Showing posts with label Recipe: Cheese. Show all posts

Sunday, May 1, 2016

Swiss Gourmet Specialties: Raclette at Home (no raclette heater)!!

Switzerland's top two cheese-related gourmet specialties are, without a doubt, fondue and raclette. Most of us here in this (South East Asian) neck of the woods should be very familiar with fondue, but chances are that raclette remains a bit of a mystery. Raclette is both the name of the dish, and the name of the cheese used; i.e. you use raclette (the cheese) to make raclette (the dish). A little confused? Well, it looks something like this:

Raclette Heater
Image courtesy of Ono Kako

To be a little more accurate, Raclette (the dish) is made by heating a whole semi-circle of raclette (the cheese), scraping off layers as they melt, and eating the melted cheese with boiled new potatoes, cornichons (small pickled gherkins), pickled pearl onions, and charcuterie (various cold meats).

If, like 100.00% of the Singapore/Malaysia population, you don't have a dedicated raclette heater, you still can sample this Swiss specialty, though - just use a toaster or your oven's broiler function! Something like this:


Oh, before we forget, Raclette is normally eaten with cornichons and pickled pearl onions - the tartness of which provides a refreshing respite from the richness, earthiness and saltiness of the cheese and cold cuts.

Cornichons and Pearl Onions
Image courtesy of French Revolution

Anyway, the entire dish is uick, easy, and very satisfying! For the charcuterie, we mixed some salami, pastrami, Aussie prosciutto and black forest ham, but it really is entirely up to you. We bought the raclette cheese (in slices) at the amazing Huber's Butchery. Don't get intimidated by the really strong smell - the taste is actually rather mild (compared to the real pungent ones like Stilton). Enjoy!

Friday, May 2, 2014

Baked Bacon Ham Spinash Cream Sauce Rice! Ongoing extra added Mix and Match Ideas

Always think this very tedious to make this but it's one of the simple and fast! Anyone can get it done in 20mins or 30mins.


Ingredients
2 bowls of Rice in Baking Bowls
4 pieces of Bacon Strips
6 pieces of Ham
3 handful of Spinach leaves
230g / approx half a bottle of Leggo's Alfredo Creamy Pasta Sauce
100ml Water
80g Grated Mozzrella Cheese


Preheat over at 190°C.

Heat pan and stir fry the bacon until it is half cooked. Then add in the Ham and stir fry until semi cook. Pour in the Alfredo Sauce and Water, combine well and bring it to a boil. Turn off the fire mix in the Spinach and divide it equally on top of the rice bowls prepared.


Top generously with grated Mozzrella Cheese and put in the oven to bake for 10mins.............


....... or until the top is slightly browned.

Do warn your family members to BECAREFUL the bowls are extremely hot!

Enjoy~!!!

Lesson Learnt: Reason why we turn off the fire and mix in the spinach only without cooking over the fire is to avoid the spinach from overcooking and turning in to dirty green dead color.

~~~~~~~~~~~~~~~~~~~~~~~~~~~~~~~~~~~~~~~~~~~~~~~~
We'll be adding our creations: Good and bad ideas. All here to share! Will update more soon..


Click here for our blog page Cooking Classes for more recipes. Hope you will be inspired~

Wednesday, November 13, 2013

Deliciously Rich Tasty French Onion Soup

This is a super easy soup to make aside from the length of cooking time of needed and some stirring needed in the middle. Bringing all of you with the detail steps of the cooking process and also to keep this as a record for me to recreate this dish again.


Ingredients
Ceramic Pot with lid
900g Yellow Onions
1.5 tablespoons Butter
0.25 cup of Sherry / White Wine
3 cups of Chicken Broth
1 cup of Beef Broth
1 Bay Leaf
1 spring of Thyme
3 cup of Water
1 teaspoon of Salt
Pepper
2 slices of Baguette (Using normal bread like me is not really a good idea but it's fine)
Grated or 2 slices of Cheese (Best selections as ranked: Gruyere - classic preference, Swiss, Jarlsbeg, Parmesan)

Step 1 Pre-heat oven to 250°C.
Step 2 Cut the onions in half through the root end, and slice into 1/4 inch thick slices from pole to pole.
Step 3 Spray the Ceramic Pot with cooking spray or pour some oil into the bottom and spread it all around with a kitchen towel.
Step 4 Cut the butter into cubes and scatter it around the Ceramic Pot.
Step 5 Put the slices of onion into the Ceramic Pot and loosen them up. Sprinkle 1 teaspoon of salt over the top.
Step 6 Cover the Ceramic Pot and place it into the oven for 30mins.
Step 7 Remove the Ceramic Pot after 30mins and take off the cover (Remember to use oven mitts!), stirring the onions and scraping down the sides. Repeat this one more time.
Step 8 The onions should just be starting to brown. Replace the cover on the Ceramic Pot but leave it slightly ajar cook for another hour.
Step 9 Remove the pot and place it on the stove over a medium high heat. Stir frequently and scrape down the sides.
Step 10 After 10-15 minutes, a dark crust should form at the bottom of the Ceramic Pot. Don’t be worried, this is fond, and it’s full of flavor. Your house would be fill with sweet onion aroma at this stage.
Step 11 After the fond is formed, pour in 1/4 cup of water and scrape the fond up from the bottom, stirring it into the onions. Repeat this 3 more times. At the end of the 4 times over the stove. The onions will be very brown and soft at this point – that’s a good sign!
Step 12 After the fourth scraping, let the fond develop one more time, then deglaze with 1/2 cup of sherry. Scrape up all the brown bits and mix it with the onions. At this point the onions should be a very dark, deep brown color.
Step 12 Pour in 2 cups of water and both the chicken and beef broths. Add in the bay leaf and a sprig of thyme. Stir to combine, then turn the heat up to high.
Step 13 When the soup starts to boil, cover the Ceramic Pot and turn the heat to low. Simmer for 30 minutes. Taste and adjust for seasoning, adding salt and pepper as needed.

Preparation for Storage.
- Let it cool in the pot. Transfer to your storage box by consumption portion.
- Place in fridge if you're consuming in 1-2days
- Place in freezer if you're consuming in a week or 2.

Preparation before serving.
Step 1 To prepare the soup for serving, toast slices of baguette most suitable but plain bread is fine.
***Just 1 slice per bowl is sufficient I'm just too greedy maybe cause I'm hungry after work.
Step 2 Ladle some hot soup into an oven safe bowl to warm up the soup.
Step 3 Cover the top of the soup with the toasted baguette and top the baguette slices with cheese.
Step 4 Place the bowls under the broiler. Watch it very carefully as the cheese bubbles and browns very quickly.
Step 5 Once the cheese has slightly brown take it out and serve. (Remember to use oven mitts!)


The broth is rich and deep, and the onion flavor really shines through. If you love French onion soup like deary do, do give this recipe a try.

Enjoy sipping every spoon of it~

Click here for our blog page Cooking Classes for more recipes. Hope you will be inspired~

Thursday, October 31, 2013

Egg Mayonnaise Sandwiches


Ingredients
3 hard-boiled Eggs
Water to boil Eggs
3 teaspoons of Mayonnaise
White Pepper to taste
Paprika to taste (Optional)
Italian Hers to taste (Optional)
2 slices of Bread
2 sliced Cheese (Optional)
2 tablespoons of diced Yellow Onions (Optional)
4 tablespoons of diced Tomatoes (Optional) - My mom use to put this when she makes egg sandwiches for us

Step 1 Place the egg in a pot, fill it with water just enough to cover.
Step 2 Put it over the stove, bring it to a boil and let it continue to boil for about 7 minutes.
Step 3 Scoop out the Egg and place it in cool water to soak for 10 minutes to drop the temperature.
Step 4 Peel the eggs & place it in a plate and mash them up.
Step 5 Add in the Mayonnaise and mix until evenly combine.
Step 6 Dash of pepper to taste and mix until evenly combine.
Step 7 Optional, place the cheese on the bread, scoop and spread the Egg Mayonnaise evenly.

It's ready to serve!


Simple filling to make a sandwich for breakfast, lunch or dinner.

Enjoy~

Click here for our blog page Cooking Classes for more recipes. Hope you will be inspired~

Tuesday, August 20, 2013

Salad Exploration ::: Mesclun Mix with Roast Chicken Leg


60g of Mesclun Mix
2 tablespoon of Salad Dressing (your favorite)
1 Sliced Cheese
1 Roast Chicken Leg

Wash the Mesclun Mix and spin them to remove all the excess water. Put the Mesclun Mix in the salad bowl and mix in your favorite Salad Dressing. Dish it in plate and top with small pieces of Sliced Cheese. Place the Rpast Chicken Leg on top & it's ready to serve.

What is Mesclun Mix? It's a mix of the below in varies propotions.


Click here for our blog page Cooking Classes for more recipes. Hope you will be inspired~

Sunday, July 28, 2013

Baking Exploration ::: Mini Japanese Cotton Cheesecake

My very very 1st cake baked from our kitchen that has passed.

Attended this recipe baking class at Sugar Inc @ Singapore, to get tips and learn some important notes about cake. Hearing from my friend that it is one of the best place to go to learn baking. Why? Because the clean up, wash up, serve you tea and give you a sample to eat while you're waiting to for your cake to pop out of the oven and cool off before you can pack up and go home.

If you're in Singapore and you would like to learn baking. This would be the place.

Click Here to view Sugar Inc Facebook page

After attending and getting our oven fixed up. This is my first bake after we shift into our newly renovated place. Been ages since I baked!!!! Itchy hands...

After attending and learning. Here I am.. to share the recipe & some of the tips with you.


Mixture A Ingredients:
160g Cream Cheese
20g Whipping Cream
20g Salted Butter
1 teaspoon Vanilla Essence
1/2 teaspoon Lemon Zest

Step By Step for Mixture A
1. Cream Cheese, Butter to be left outside till it is room temperature or Heat in the microwave for 20-40 seconds till Cream Cheese is softened. Whisk Cream Cheese, Whipping Cream and Butter until smooth.
2. Add in Vanilla Essence and Lemon Zest and continue whisking until smooth.
3. Leave it to cool.

*** *** *** *** *** *** *** *** *** *** ***

Mixture A+B Ingredients:
100-120g Fresh Egg Yolks
20g sifted Cake Flour

Step By Step for Mixture A+B
1. When Mixture A is cool, whisk in the Egg Yolks.
2. Followed by the sifted Cake Flour until the mixture is smooth.

*** *** *** *** *** *** *** *** *** *** ***

Mixture C Ingredients:
180g Egg Whites
1 teaspoon Cream of Tartar
90g Caster Sugar

Step By Step for Mixture C
1. In another Mixing Bowl, whip egg whites for a few seconds on low speed. When it looks foamy add Cream of tartar and mix for another few seconds.
2. Add 2/3 of the Caster Sugar and mix on low speed until you can see the visible trails on the surface of the foam. This is to build the structure.
3. Add the remaining of the sugar and whip until medium peak.

*** *** *** *** *** *** *** *** *** *** ***

Step By Step for Mixture (A+B)+C
1. Using a Spatula, fold in the upward motion 1/4 of the meringue GENTLY into the Mixture A+B.
2. Slowly 1/4 by 1/4 till all is completed. Do not over fold! Stop when the mixture is evenly coloured.

*** *** *** *** *** *** *** *** *** *** ***

Baking needs:
1 litre of Water
Muffin pan (x2)
Muffin Cups
Baking Tray
Baking Wire Rack

Baking & Serving Step by Step
1. Boil water for the hot water bath.
2. Pre-Heat the oven at 170°C.
3. Line the bottom with Muffin Cups and fill them up with the batter.
4. Pour the Boiling Water on the Baking Tray. Place the Baking Wire Rack on top of the Baking Tray.
5. Place the filled Muffin Pan on top and place in the oven to bake in the hot water bath for 20-25mins.
6. When time is up check the cake with a wooden skewer. Insert in the centre of the cake. It should come out fairly clean.
7. Unmould the cake soon after baking to prevent the top from becoming wrinkled. Place on a wire rack to cool.
8. Chill overnight before serving.
9. Dip the knife in hot water before cutting for clean slices.
Optional: Before Serving, dust it with icing sugar to give it a dreamy look!

*** *** *** *** *** *** *** *** *** *** ***

List of Tips from this bake
i) Must use cake flour.
Reason: Click here to read "What is cake flour, what makes it different than self-rising or all purpose?"
ii) It's Important to use Fresh Eggs, best 2-3days after you buy from store.
iii) Reason why the Egg measurement is used is due to the variation of size of eggs available in the market.
iv) Medium Peak is when you lift up the tip of the meringue should be able to stand up stiffly with a slight hook at the tip.
iv) If the baking pan has a removable base, wrap the outside surrounding and above the rim with Aluminium Foil as shown in picture.
v) For Mini Muffin size, fill it 3/4 as you can see below is the results of filling it up 1/2 only.
vi) Do not use oven fan mode when baking cakes or muffins, to avoid the cake from being blowed unevenly.
vii) Place the tray at the second lowest of the oven to prevent the bottom from being damp.

Wish you all success in baking! ^_^


Click here for our blog page Baking Classes for more recipes. Hope you will be inspired~

Monday, August 22, 2011

Sandwiches Exploration ::: Cheddar Cheese Toast

Offtopic: We are now on Twitter, so Follow Us on Twitter to get first-hand updates whenever we ... update!

Yums……………this is for those who are crazy over CHEESE!!!!!!!!! Like me…!?!?

*Cheddar Cheese Toast 1

All you need is
2 slice of White Toast to make each sandwich
Cheddar “flakes”.
Butter

Step 1: Heat Non-stick Pan to Low heat.
Step 2: Melt Butter.
Step 3: Toast in 2 slice of white bread for 30seconds to heat the bread.
Step 4: Turn 1 around only and generously put the Cheddar “flakes” in the middle and spread them around slightly so you can bite cheddar in every bites of this toast.
Step 5: Place the other toasted side of the other slice of white bread on top of the Cheddar “flakes”. This is so the heat will melt the Cheese…. Yumss…. Almost there!
Step 6: Melt a little more butter on the empty side of the pan, then flip to toast the untoasted side. Sprinkle some cheddar on top, for the crisps. Turn it over and continue letting it toast for 1min. Sprinkle some Cheddar flakes while waiting.
Step 7: Flip over and toast for another 1min.
Step 8: Sliced the sandwich in triangle half shape & serve hot.

I particularly love this sandwich… will share more of the crazy cheese toast and other sandwiches I made when I was a kid with all of you some day.

For now explore our Recipe Page Tabs for easier search for recipe! Don’t need to worry how the dish will look like there are mini thumbnails placed there for you, with the Recipe Name to see and click which will directly brings you to our blog post.

Have fun….

*Cheddar Cheese Toast 2

Click here for our blog page Breakfast, Desserts, & Snacks Ideas for more recipes. Hope you will be inspired~

Friday, April 29, 2011

Baking Exploration ::: Cheese Tarts

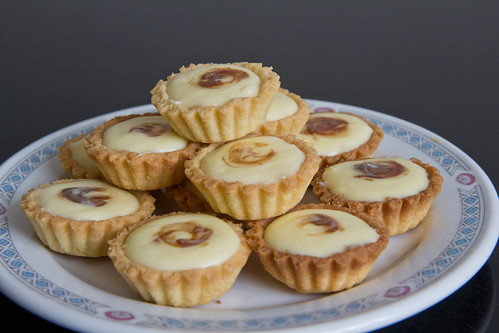
Cheese Tarts 12

It's been ages since I very last baked my legendary Cheese Tarts that my hometown family friends that had a chance to taste it, came back ask for more, and asking if they could place order. Since I'm a big fan of cheese and cheesecakes too, I'm baking it again!!! Not forgetting I'm more of a chocoholic actually.

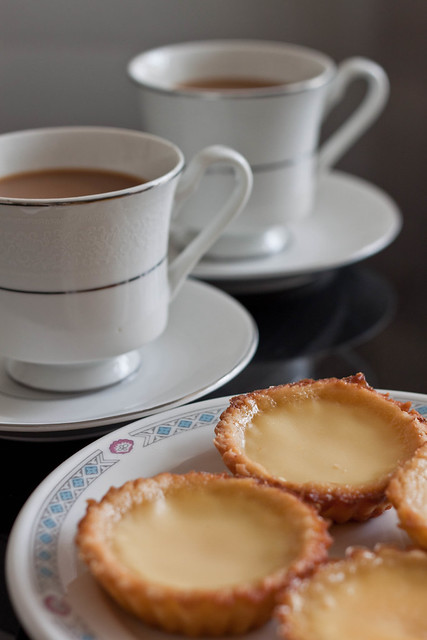
Egg Tarts again!

Happy Friday! We both started our day off with my warm up Egg Tarts that I baked yesterday, along with Mauritius Roasted Coffee bought from Mauritius on our trip there last year Nov-Dec. A very suitable, combination which dear's daddy mentioned. *****yummy yummysss*****

Getting back to baking Cheese Tarts.

For the pastry, I use back the same pastry as my Level 1 Egg Tart Exploration.

Tart Crust Recipe
115g Butter (softened)
70g Sugar
1 Egg
210g All-Purpose Flour
1/4 teaspoon Salt
Removable Bottom Tart Pan

Grease the tart pan with Butter. Cream Butter and Sugar until light and fluffy. Add the egg and beat until mixture is smooth. Add the Flour and Salt and mix well. Divide the mixture, then use your fingertips to press the dough into the tart pan. Prick all over of the base of the tart with a fork. Refrigerate for 30minutes. Pre-heat the oven to 180°C. Bake for 5mins to 10mins or until slightly golden. While it's baking prepare.......

However, this round here are some pictures of the pastry process!

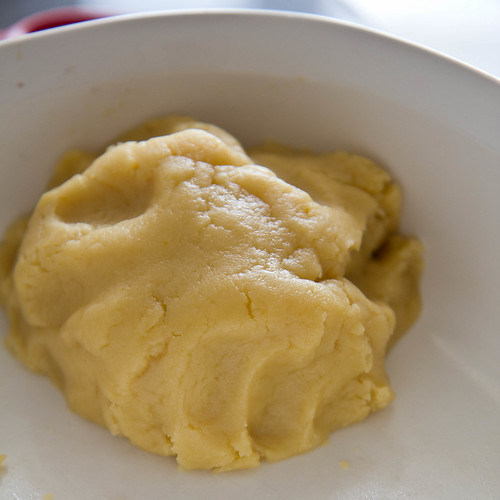
After the dough is mix up nicely, it would look like this!

Cheese Tarts 1

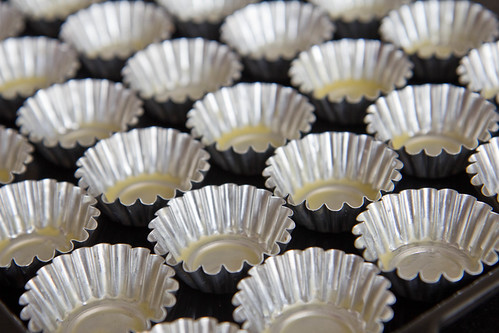
Since it's cheese tarts and I love it more when it's a mini version, I took out my long not use mini tart molds and butter all of them before i press the pastry dough in.

Cheese Tarts 2

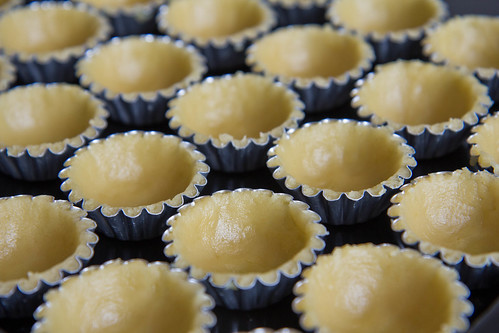
Taking the pastry dough smaller then a ping pong ball size, and roll it up. Oh! remember to press it flat too!

Cheese Tarts 3

Press the flat pastry dough in the tart molds, and cut off the edges so it looks like this. Now you're half way done. From Mixing to pressing out the pastry normally takes up half or more then half of the whole process of all tart baking.

Cheese Tarts 4

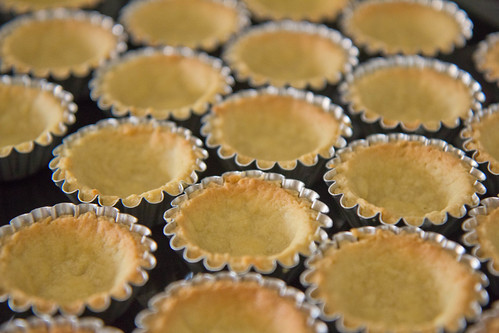
After the 10mins baking time at 180 degree C. This is the tart shell that can be used to do tons of tarts eg: egg tarts, cheese tarts, fruit tarts.....

Cheese Tarts 6

Now it's time for the most important part of this bloggie post!

THE.....................

Cream Cheese Fillings
Ingredients:::
250g Philadelphia Cream Cheese
20g Butter
60g Fine Granulated Sugar
1 Egg

(for some artistic work)
2-3 cubes of Milk Chocolate
OR
2-3 tablespoon of Blueberry Jam

Cheese Tarts 5

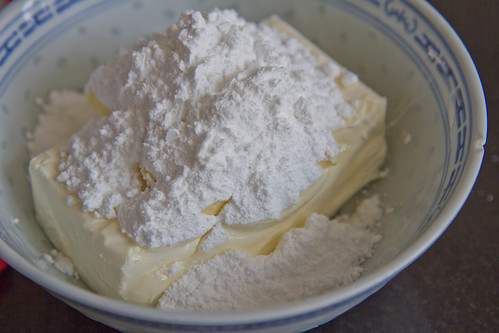
Beat the Philadelphia Cream Cheese, Butter, and Fine Granulated Sugar together till light, then add in the egg and beat to mix well.

Cheese Tarts 7

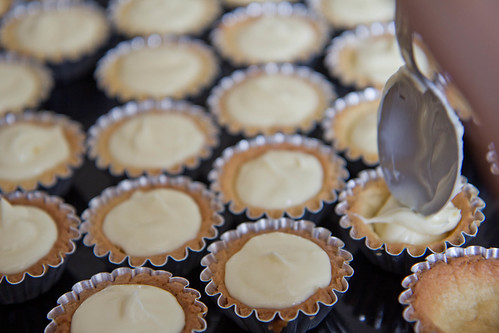
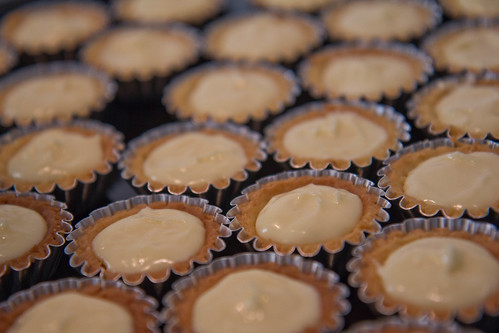
Using a tablespoon to spoon the cheese mixture, along with the assistant of a teaspoon to push the mixture down easily into the baked tart shells.

Cheese Tarts 8

If you are using chocolate, melt them in a double boiler and add a teaspoon or two of milk, this will make the texture of the chocolate more suitable for your artistic drawings to make your cheese tarts look more mouth watering.
This is an important note: As I couldn't find any milk at home so my chocolate texture makes my tart looks a bit................... ugly =[ Good thing I am the one making this mistake so your tart won't look like mine!

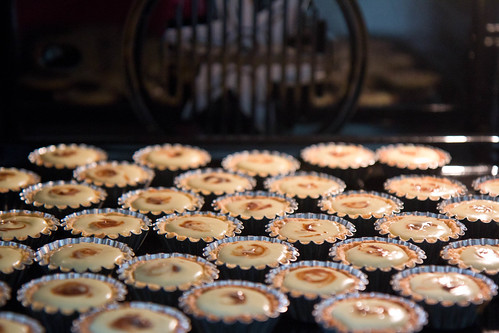
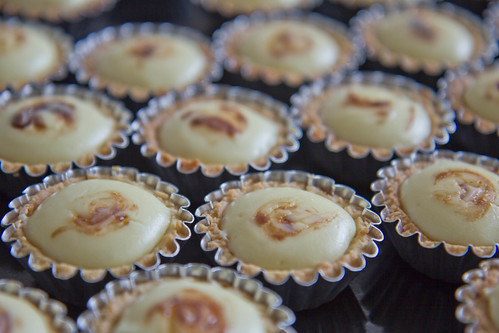
No matter if you are using Chocolate or Blueberry Jam, depending on your tart size put a dot in the middle of the tart and use a chopstick to do some twirling, simple like mine. However, if you are artistic enough you can try piping the Chocolate or Blueberry Jam and use a satay stick to draw patterns. ^.^

After you finish your art work, place all of it back into the oven and bake for another 180 degree C for 10mins.

Cheese Tarts 9

Take it out to cool for 30mins to 45mins. Since Cheese Tarts are best when served cold. After it is cool to put it in the fridge to chill before serving or consuming.

Cheese Tarts 10

There you go ready to impress the people around you that you can bake!

Cheese Tarts 12


Click here for our blog page Baking Classes for more recipes. Hope you will be inspired~