Showing posts with label Recipe: Desserts. Show all posts

Sunday, September 13, 2015

Ice Jelly Dessert (includes steps and different varieties ideas)

On a hot day this would be a bowl of dessert that will come to my mind. Simple refreshing, sweet and most importantly cold.

During my childhood, my family always chill off by heading out to the food court to have desserts. This is one of the popular choice on the menu.


Base Cookie Dough Ingredients:
1 pack of Instant Ice Jelly Powder
4-5 Ice Cubes / Crushed Ice
2 tablespoons Lime Juice
1 tablespoon Sugar Syrup / Honey

Step By Step
  1. Prepare the Ice Jelly by follow packaging instructions. Normally one pack can serve up to 4 bowls or more.
  2. Scoop Ice Jelly into a bowl, add Ice Cubes / Crushed Ice, Lime Juice and Sugar Syrup / Honey.
  3. Top it off with any fruits you love. Below are some ideas of ours.

Some Extra Tips Below:
- Adjust the sugar level to your liking.
- Crush ice is a better choice.

~~~~~~~~~~~~~~~~~~~~~~~~~~~~~~~~~~~~~~~~~~~~~~~~
Below is my creations hopefully it'll inspire you. You may split the base cookie dough is 2 parts and half the portion as per suggested below for more varieties. Hope you all will love this recipe.

Lychee Ice Jelly Dessert
6 pieces Lychee
2 tablespoons Nata de Coco
2 tablespoons Rainbow Tadpole


Click here for our blog page Dessert and Drinks Recipes for more ideas. Hope you will be inspired~

Thursday, July 31, 2014

Colorful Snowskin Mooncakes (includes steps and different varieties ideas)

After our successful experimentation of Baked Traditional Mooncakes with the basic Plain, Single Yolk, Double Yolk, etc, here we are experimenting the mooncake dessert world which is the snowskin mooncakes.

Check out our recipe of Traditional Baked Mooncake (includes steps and different varieties ideas)

Getting back to topic. This recipe yields approx 17, 60g Snowskin Mooncakes.


Basic Snowskin Dough

Dough Ingredients
150g Koh Fun/Kou Fien (or prepare your own self cooked Glutinous Rice Flour, method can be found in this recipe of ours)
150g Icing Sugar
70g Shortening
150ml Cold Water
Coloring

1. Sift the Kou Fien & Icing Sugar in a mixing bowl.
2. Gently rub the Shortening in to te dry mix until no lumps of Shortening can be found and looks like crumbs.
3. Divide the crumbs into equal portions in small bowls depending on the number of colours you wish to have. Same as well with the Cold Water then mix in the coloring into the water.
4. Pour in only a tablespoon of Colored Cold Water at a time to the Dry Crumbs. Slowly knead them until well combine.
5. Place the snowskin dough in a airtight container and chill the dough in the fridge for 30mins to an hour before use.


~~~~~~~~~~~~~~~~~~~~~~~~~~~~~~~~~~~~~~~~~~~~~~~~
Below are my creations: All here to share! Will update more soon and hopefully add on the step by step guide photos. Below are the experimented best weight of paste & other required ingredients.

Rainbow Snowskin Mooncake with Plain White Lotus
Total 340g; per mooncake 20g Snowskin Dough
Total 680g; per mooncake 40g Paste
Icing Sugar

1. Roll each color dough into 1cm diameter strips, line them all together and give it a tight squeeze and roll.
2. Slice them equally approx 19g to 20g.
3. Use a rolling pin and roll the Snowskin Dough flat.
4. Next Roll the paste into a ball.
5. Place it paste in the middle of the rolled Snowskin Dough and wrap the paste evenly with the Snowskin Dough.
6. Lightly coat with cooked glutinous rice flour. Shake off any excess flour. Place it in the Mooncake Mold and flatten the shaped Snowskin Dough to conform to the shape of the Mooncake Mold.
7. Gently push out the Snowskin Mooncake and store in a air tight container.
8. Let it chill overnight before consuming.


Snowskin Mooncake with Plain or Alcohol Chocolate Truffle
Total 340g; per mooncake 20g Snowskin Dough
Total 425g; per mooncake 25g Paste
Total 17; per mooncake 1 Plain or Alcohol Chocolate Truffle
Icing Sugar

Plain and Alcohol Chocolate Truffle recipe link here! For Snowskin Mooncake, generously coat the truffles with a layer of Dark Chocolate believe it will taste better. Going to try shelled Truffle next round! Alternatively you can buy ready made from bakery or look around for Truffle sold in chocolate shop.

1. Portion the Snowskin Dough equally approx 19g to 20g.
2. Use a rolling pin and roll the Snowskin Dough flat.
3. Next Roll the paste into a ball create a well big enough to fit the Chocolate Truffle and wrap the paste around it evenly.
4. Place it paste in the middle of the rolled Snowskin Dough and wrap the paste evenly with the Snowskin Dough.
5. Lightly coat with cooked glutinous rice flour. Shake off any excess flour. Place it in the Mooncake Mold and flatten the shaped Snowskin Dough to conform to the shape of the Mooncake Mold.
6. Gently push out the Snowskin Mooncake and store in a air tight container.
7. Let it chill overnight before consuming.

Snowskin Mooncake with White Lotus and Honey Grapefruit Lemon
Total 340g; per mooncake 20g Snowskin Dough
Total 425g; per mooncake 20g White Lotus Paste
Total 425g; per mooncake 20g Honey Grapefruit Lemon Paste
Icing Sugar

1. Portion the Snowskin Dough equally approx 19g to 20g.
2. Use a rolling pin and roll the Snowskin Dough flat.
3. Next Roll the paste into a ball create a well big enough to fit the rolled Honey Grapefruit Lemon Paste and wrap the White Lotus paste around it evenly.
4. Place it paste in the middle of the rolled Snowskin Dough and wrap the paste evenly with the Snowskin Dough.
5. Lightly coat with cooked glutinous rice flour. Shake off any excess flour. Place it in the Mooncake Mold and flatten the shaped Snowskin Dough to conform to the shape of the Mooncake Mold.
6. Gently push out the Snowskin Mooncake and store in a air tight container.
7. Let it chill overnight before consuming.

Lesson Learnt: Don't bother trying to coat a layer of chocolate to saperate the Paste...

Normal storage tips: Place it in a air tight container and store in fridge immediately, consume within a week.
To store up to a few weeks: Place it in a air tight container and store in freezer immediately. A night before consumption, place the container in the fridge and let it thaw. Or Typically thawed a few hours in a fridge before serving, to allow them to soften. Refreezing is not advised.

~~~~~~~~~~~~~~~~~~~~~~~~~~~~~~~~~~~~~~~~~~~~~~~~
Below are some photo spams of the finish products. Will update more soon as we create new ones.


Click here for our blog page Baking Classes for more recipes. Hope you will be inspired~

Sunday, September 29, 2013

Dessert Exploration::: Japanese Konnyaku Grape Jelly with Fresh Peeled Seedless Grapes


Ingredients
Japanese Konnyaku Grape Jelly (Picture shown below)
500ml of Boiling Water
1 small bowl of Fresh Peeled Purple Seedless Grapes
Alluminium moulds/Silicon/Plastic cups
Thermometer
While the water is boiling, sort out the Fresh Peeled Purple Seedless Grapes into the Alluminium moulds/Silicon/Plastic cups.

Pour the water in a bowl, place the thermometer and check if the water is above 90ºC, when is pour in the Japanese Konnyaku Grape Jelly powder...
...stir until all dissolve.
Distribute the apanese Konnyaku Grape Jelly mixture into the Alluminium moulds/Silicon/Plastic cups. If there are bubbles remember to break them for a smooth finish.
Put all the filled cups into the fridge to chill and you'll get to eat Japanese Peach Jelly soon!

Enjoy~

Click here for our blog page Desserts & Drinks for more recipes. Hope you will be inspired~

Thursday, September 26, 2013

Dessert Exploration ::: Ginkgo Nuts + Barley + Fu Chok (白果薏米)


Ingredients
100g of Candied Winter Melon
1/2 cup of Barley
8 to 10 Gingko Nuts
1/4 packet of Dried Bean Curd Skin (pre-soaked to soften)
1L of Filtered Water

Step 1 Wash the Barley thoroughly and boil it for 20mins. While it's boiling break up the pre-soaked Dried Bean Curd Skin.
Step 2 Put in the Candied Winter Melon and Gingko Nuts and boil for another 20-30mins until everything is soft.
Step 3 Preferably served hot. However it can be served chilled too!


Deary mentioned that prefer Big Chunky Candied Winter Melon will not slice then up the next round.

Enjoy~

Click here for our blog page Desserts & Drinks for more recipes. Hope you will be inspired~

Wednesday, August 21, 2013

Dessert Exploration::: Japanese Peach Jelly 80ºC with Japanese Canned White Peach


In search of the perfect Japanese Peachy Peach Jelly that we always never fail to buy every night when we are in Japan for Travels. I believe we have did it!!! It's a kind of pricey but it's very worth for a treat then purchasing it over the counter outside Japan.

If you love Western Peaches, which is also more cost saving. Here is our previous post:Japanese Peach Jelly 80ºC with Western Canned Peach

We have also blogged our itenaries and experience in Japan. Feel free to check out "Our Travels, bits & pieces of our life... come along!" Tab above! Or Click Here

Ingredients
Japanese Peach Jelly 80ºC (Picture shown below)
1 litre of Boiling Water
1 can of Japanese White Peach
Alluminium moulds/Silicon/Plastic cups
Thermometer


While waiting for the water to boil, cube up the peaches and place them in the Alluminium moulds.

Pour the water in a bowl, place the thermometer and wait for the water to reach 80ºC. When it reaches pour in the Japanese Peach Jelly 80ºC powder and stir until all dissolve.


Distribute the Japanese Peach Jelly 80ºC mixture into the Alluminium moulds. If there are bubbles remember to break them for a smooth finish. Put all the filled cups into the fridge to chill and you'll get to eat Japanese Peach Jelly soon!


Enjoy~

Click here for our blog page Desserts & Drinks for more recipes. Hope you will be inspired~

Sunday, July 28, 2013

Baking Exploration ::: Mini Japanese Cotton Cheesecake

My very very 1st cake baked from our kitchen that has passed.

Attended this recipe baking class at Sugar Inc @ Singapore, to get tips and learn some important notes about cake. Hearing from my friend that it is one of the best place to go to learn baking. Why? Because the clean up, wash up, serve you tea and give you a sample to eat while you're waiting to for your cake to pop out of the oven and cool off before you can pack up and go home.

If you're in Singapore and you would like to learn baking. This would be the place.

Click Here to view Sugar Inc Facebook page

After attending and getting our oven fixed up. This is my first bake after we shift into our newly renovated place. Been ages since I baked!!!! Itchy hands...

After attending and learning. Here I am.. to share the recipe & some of the tips with you.


Mixture A Ingredients:
160g Cream Cheese
20g Whipping Cream
20g Salted Butter
1 teaspoon Vanilla Essence
1/2 teaspoon Lemon Zest

Step By Step for Mixture A
1. Cream Cheese, Butter to be left outside till it is room temperature or Heat in the microwave for 20-40 seconds till Cream Cheese is softened. Whisk Cream Cheese, Whipping Cream and Butter until smooth.
2. Add in Vanilla Essence and Lemon Zest and continue whisking until smooth.
3. Leave it to cool.

*** *** *** *** *** *** *** *** *** *** ***

Mixture A+B Ingredients:
100-120g Fresh Egg Yolks
20g sifted Cake Flour

Step By Step for Mixture A+B
1. When Mixture A is cool, whisk in the Egg Yolks.
2. Followed by the sifted Cake Flour until the mixture is smooth.

*** *** *** *** *** *** *** *** *** *** ***

Mixture C Ingredients:
180g Egg Whites
1 teaspoon Cream of Tartar
90g Caster Sugar

Step By Step for Mixture C
1. In another Mixing Bowl, whip egg whites for a few seconds on low speed. When it looks foamy add Cream of tartar and mix for another few seconds.
2. Add 2/3 of the Caster Sugar and mix on low speed until you can see the visible trails on the surface of the foam. This is to build the structure.
3. Add the remaining of the sugar and whip until medium peak.

*** *** *** *** *** *** *** *** *** *** ***

Step By Step for Mixture (A+B)+C
1. Using a Spatula, fold in the upward motion 1/4 of the meringue GENTLY into the Mixture A+B.
2. Slowly 1/4 by 1/4 till all is completed. Do not over fold! Stop when the mixture is evenly coloured.

*** *** *** *** *** *** *** *** *** *** ***

Baking needs:
1 litre of Water
Muffin pan (x2)
Muffin Cups
Baking Tray
Baking Wire Rack

Baking & Serving Step by Step
1. Boil water for the hot water bath.
2. Pre-Heat the oven at 170°C.
3. Line the bottom with Muffin Cups and fill them up with the batter.
4. Pour the Boiling Water on the Baking Tray. Place the Baking Wire Rack on top of the Baking Tray.
5. Place the filled Muffin Pan on top and place in the oven to bake in the hot water bath for 20-25mins.
6. When time is up check the cake with a wooden skewer. Insert in the centre of the cake. It should come out fairly clean.
7. Unmould the cake soon after baking to prevent the top from becoming wrinkled. Place on a wire rack to cool.
8. Chill overnight before serving.
9. Dip the knife in hot water before cutting for clean slices.
Optional: Before Serving, dust it with icing sugar to give it a dreamy look!

*** *** *** *** *** *** *** *** *** *** ***

List of Tips from this bake
i) Must use cake flour.
Reason: Click here to read "What is cake flour, what makes it different than self-rising or all purpose?"
ii) It's Important to use Fresh Eggs, best 2-3days after you buy from store.
iii) Reason why the Egg measurement is used is due to the variation of size of eggs available in the market.
iv) Medium Peak is when you lift up the tip of the meringue should be able to stand up stiffly with a slight hook at the tip.
iv) If the baking pan has a removable base, wrap the outside surrounding and above the rim with Aluminium Foil as shown in picture.
v) For Mini Muffin size, fill it 3/4 as you can see below is the results of filling it up 1/2 only.
vi) Do not use oven fan mode when baking cakes or muffins, to avoid the cake from being blowed unevenly.
vii) Place the tray at the second lowest of the oven to prevent the bottom from being damp.

Wish you all success in baking! ^_^


Click here for our blog page Baking Classes for more recipes. Hope you will be inspired~

Wednesday, June 12, 2013

Dessert Exploration::: Japanese Peach Jelly 80ºC with Western Canned Peach


Peachy Peach Jelly since darling love peach so much. When I found this at Isetan Orchard Singapore, just couldn't resist and grab it to make for our dessert and also share with our friends in office.

Japanese Peach Jelly 80ºC (Picture shown below)
1 Litre of Boiling Water
1 Can of Western Peach
Silicon/Plastic cups
Thermometer

Find the following product in the Japanese store. It's good enough to make it into a Jelly without canned Peach. We love the flavour of the jelly itself.


While waiting for the water to boil, cube up the peaches and place them in the silicon cups.


Pour the water in a bowl, place the thermometer and wait for the water to reach 80ºC. When it reaches pour in the Japanese Peach Jelly 80ºC powder and stir until all dissolve.


Distribute the Japanese Peach Jelly 80ºC mixture into the silicon cups. If there are bubbles remember to break them for a smooth finish. Put all the filled cups into the fridge to chill and you'll get to eat Japanese Peach Jelly soon!


Enjoy~

Click here for our blog page Desserts & Drinks for more recipes. Hope you will be inspired~

Saturday, December 17, 2011

Dessert Exploration ::: Mango..Mango..Mango Pudding - everyone loves it~!!!

WooHooo~ At last here is a dessert recipe to share with my readers...

This is specially for Mango Lovers or Mango Pudding Lovers out there!!!

Mango..Mango..Mango Pudding - everyone loves it~!!!


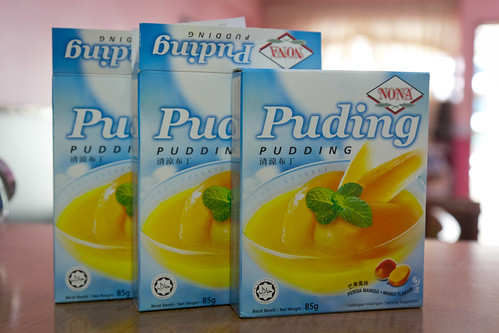
I have tried so many brands of Mango Flavor Pudding Powder and this (Nona Pudding - Mango Flavor) is the one I would say this is the BEST among those that I have tried. Those who have the privilege to taste would second on how delicious this turns out!

dear loves it too!!!!

Mango..Mango..Mango Pudding - everyone loves it~!!!


Ingredients:::
Nona Pudding - Mango Flavor (1pack = 400ml)
Boiled Filtered Water
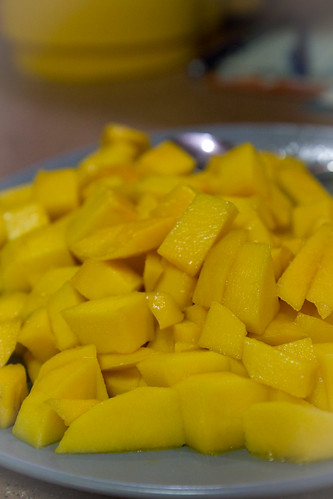
150g whole Sweet Mango

Peel & cut the Sweet Mango into cubes, when done it will approx come up to 100g of sweet mango cubes to be used.
Mango..Mango..Mango Pudding - everyone loves it~!!!


Wondering how i get all my mangoes to be so sweet & ripe?
Click here to view our tip on "how to speed ripen mango?"

Take a big bowl and pour out the Nona Pudding Powder then measure the Boiled Filtered Water and stir till all dissolved. Fill half of the Nano Mango Mixture in to the molds / bowls / serving dish. Add in the Mango Cubes and scatter them around.
Mango..Mango..Mango Pudding - everyone loves it~!!!


Pour the other half of the Nano Mango Mixture slowly so it won't disturb your mango cubes distribution that you just did.

Place it in the fridge for 30mins - 60mins to chill & set.

Serve it with a mini side jar of evaporated milk if anyone wants to drizzle and enjoy it with the Mango Pudding.

Smiles on all faces. This huge portion has x4 of this recipe here. With BIG help from dear we made it for our Cell Group Christmas Pot Love.

Mango..Mango..Mango Pudding - everyone loves it~!!!


Click here for our blog page Desserts & Drinks for more recipes. Hope you will be inspired~

Tuesday, May 10, 2011

Learn to make Macarons and more at Taylor's University!

"More and more bakeries are introducing the macaron in their menus as this sweet sensation sweeps through the Klang Valley," says a leading local English newspaper, in opening up a fluff story about macarons. While the terms 'sweep' and 'sensation' are perhaps open to personal interpretation, it's clear that Macarons have been getting more attention in Kay-El of late. And what's not to love? Macarons combine fuss-free finger eating with a myriad of colours and flavours limited only by the baker's imagination. The only criticism, perhaps, is that it might be too sweet for some taste buds.

Anyways, the darling and I find ourselves on a Sunday afternoon, in Taylor's University's Pastry Kitchen with award winning Chef Karam for a quick and easy class on how to bake Macarons. Chef Karam has over 20 years of kitchen experience prior to joining the academic field, so we know we're in good hands!


After a quick demonstration by the Chef, we're let loose into the kitchen to whip up our own batch of Macarons!

Step 1: Mix crushed almonds, sugar, and egg whites.


Step 2: Boil some sugar.


Step 3: Add the boiling sugar to more egg whites and whisk.


Step 4: Fold in the crushed almond mixture.


Step 5: Mix in the food colouring of your choice.


Step 6: Spoon the mixture into a icing bag.


Step 7: Pipe the mixture onto baking sheets (yes, I know, I badly needed a haircut months ago).


Step 8: Admire your handiwork. Or as in my case, lack thereof.


Step 9: Bake!


Step 10: Leave your macarons to cool while you work on the filling.


Step 11: Use more icing bags to pipe jam, butter cream, chocolate ganache, or whatever you fancy, and sandwich the macarons.


Done!


You'll have noticed that we haven't provided any actual measurements or detailed steps - we're holding off for now because we want to try again in our own home kitchen. Because, you know, how many of us have industrial strength ovens and food service-style baking trays sitting in our kitchens? We'll cook up a batch in our home and will give you the recipe soon, promise!

For me, the hardest part of making the Macarons was probably the process of piping the unbaked mixture onto the baking sheets/trays. I guess I lack the skill and dexterity to get them round and uniform. Nothing a little practice can't change, of course :)

And if you're interested in learning more, Taylor's University offers weekend classes - typically over 2 months - covering cooking, baking and pastry making, both basic and intermediate levels. For details, please contact Ms. Anne Tay at 014-633 5114 / 603-5629 5000 (Ext: 5780) or email cpe@taylors.edu.my.