If you're a regular reader of our blog you might have figured out that our favorite foods are Japanese - and
Steak. We don't eat as much as we'd like, though, because cheap steak isn't good, and
good steak isn't cheap. The more well heeled among you might have no problems putting down 300 bucks regularly on a prime piece of meat at
Morton's, but for the less financially endowed, we've always recommended cooking your own steak at home.
Typically we've always just gone with the Pan Sear method which we've previously blogged about
here. That post is pretty old though; since then we've moved on to using a heavy bottomed stainless steel pan, using just salt and pepper, and flipping every 15-20 seconds ala
Heston Blumenthal style. It's a common and competent methodology of searing your meat, but there are a few drawbacks:
- It takes a lot of practice (and error) to get the steak to your desired cooked level via touch
- Pan searing leaves a greasy, oily mess in a surprisingly large radius around the pan
- You need a really hot pan to get a nice crust; but that heat can also overcook the edges before the middle gets up to temperature
So we've been experimenting with a few alternative methods to see if we can get a 'better' cooking method. Today we're reviewing
Modernist Cuisine's low temperature Oven steak! For this method you will need, at minimum, an Oven that can go low temperatures (70 degrees C), and a meat thermometer.

Today's guinea pig cut of beef comes from an Australian
Omugi Gyu (Barley-fed Japanese-origin cattle reared in Australia) cow. The first step in the process is to
freeze the steak for at least 30 minutes. This is supposed to get the steak cold enough to get a nice sear on the outside without at all cooking the inside. For this steak we spent about a minute on each side with an Iwatani Propane blow torch - completely optional, though. If you don't have a blow torch (or are worried about getting unburnt propane on your steak) you can also just pan-sear on as high heat as possible.

The next step is to then bake! We set our oven on 70 degrees and plonked the steak right in the middle. That wire you see sticking out the right side is our meat thermometer probe, and the dial on the lower left is an oven thermometer. For medium rare you're looking to cook until the internal temperature reaches 55-56 degrees Celcius. For our try it took about 45 minutes. If your oven doesn't go that low it's OK, just cook at the lowest temperature you can.
A point to note here when adding seasoning. When you pan-sear, a lot of that seasoning flows off into the oil, however using this method most of it
stays on the steak; Pepper is fine but you should add a lot less salt than you would typically add to a pan-seared steak otherwise you might end up with something too salty.

So after 45 minutes - all done! As a bonus, resting is unnecessary, serve immediately :)

We find that the steak is cooked very evenly all the way through (except for the edges which we crusted up with the blowtorch, of course). The meat also loses a remarkably miniscule amount of juice, possibly because it's effectively been 'resting' for almost an hour. And because we haven't added any oil to the steak during the entire cooking process, we end up with a cleaner plate as well.
On a side note, we find that when cooking a rib eye, the cap is always redder than the other meat - you can see it very obviously in the photo as well. Is this because the cap takes longer to cook? Or is it just as well cooked and the red color is due to some other reason? Leave us a comment below if you have any knowledge on the matter!
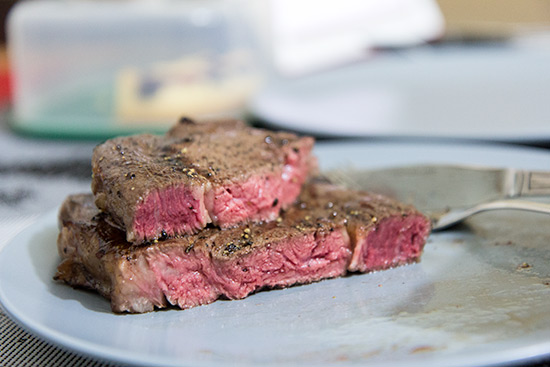
The rib-eye is delicious, and cooked just the way we want it!
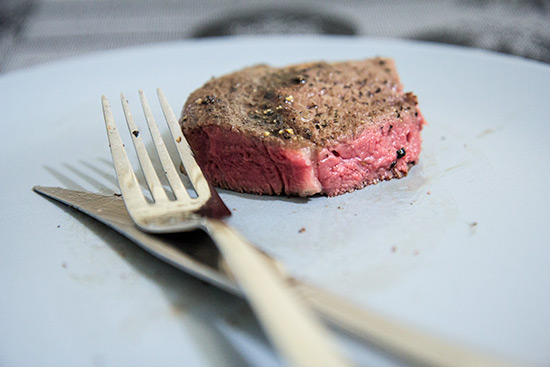
The disadvantages, of course, are clear - prep and cooking time is something like an hour and a half, which is a whole lot of time more than the 10 minutes it would take you to prep and pan-sear. However what we like about this method is that it takes a lot of the skill out of the equation - cooking to a set temperature ensures you consistent, accurate results every time, and it works no matter how thick your slab is. Don't need to mop the oil splatter off the floor after, too!
The next method we're planning to try is of course the sous vide method. Unfortunately sous vide machines (even the home ones) are pretty freaking expensive, so it'll probably be the ghetto freezer box style :) stay tuned!
Click here for our blog page Cooking Classes for more recipes. Hope you will be inspired~


