Saturday, November 30, 2013

Chocolate Fudge Cake with Dark Chocolate Ganache Frosting

My very 1st successful from scratch birthday cake with froasting and decoration!!! For deary I'm so happy with my perfect birthday cake.


My very 1st massive charity bake. Once a upon a time (4 years plus) there was 3 ladies who started off encouraging each other to bake, to buy the same kitchen gadgets for their bakes, to be an online shopaholic for baking goods, to start selling their bakes, to open shop, etc. This year Standard Chartered Bank SG50 Baking for Sight Charity Event by Seeing is Believing have brought us to work together to sell our bakes. Thanks everyone for your overwhelming support! The Baking Buddies rock with 3 bakers only & we raised SGD$1,762. Believe we're the smallest team that raised so much funds~

I baked approximately 120 cupcakes and receive very very good feedback and praise. This recipe yields 16 cupcakes of 11cm diameter size cupcake cups. Approx 8 recipes!


Pre Mixed Dry Ingredients
108g Top Flour
0.5 teaspoon Baking Soda

Measure, Mix them up and set it aside.

Other Ingredients
58g Chocolate
60ml Hot Decaf Coffee
58g Butter
180g Brown Sugar
0.5 teaspoon Fine Salt
2 Eggs
0.5 teaspoon Vanilla Extract
90ml Butter Milk

Step 1 Grease two 5" round cake pans.
Step 2 Place Chocolate in a bowl and pour in the Hot Decaf Coffee. Mix until combine.

Step 3 In a large mixing bowl, cream the Butter, Salt and Sugar.
Step 4 Add in the beaten egg portion by portion each time after it's well combined.
Step 5 Add in Vanilla Extract and mix well.
Step 6 Pour in the Chocolate Coffee mixture a little at a time and mix well.
Step 7 Preheat the oven to 160°C.
Step 8 Add 1/5 of Pre Mixed Dry Ingredients and fold it in slowly to avoid pocket of flour.
Step 9 Pour 1/5 of the Buttermilk and fold in until well combined.
Step 10 Repeat Step 7 & 8 until all the Pre Mixed Dry Ingredients & Buttermilk is all mixed in.
Step 11 Pour batter into prepared pans.
Step 12 Bake for 25mins, insert the cake tester. If it comes out clean remove the cake from the oven as the cake is done. If there is some sticky dough on place it back in the oven to cook a while more.
Step 13 Leave the cake to cool in the tin on a wire rack for 30mins then remove from the tin and leave it on the wire rack to cool completely.

Froast it with Chocolate Ganache Frosting. For recipe Click here!


We love this recipe. It's a keeper.

HAVE FUN & ENJOY!!!!!!

Overall Feedback: Moist, Fudgy, Rich, Chocolate Delight, Not Sweet. Similar to Breadtalk Boston Chocolate Cake and Awfully Chocolate Moist Dark Chocolate Cake.

Click here for our blog page Baking Classes for more recipes. Hope you will be inspired~

Thursday, November 28, 2013

Best Sushi in Singapore - Shinji by Kanesaka, Raffles Hotel

If you like Japanese food, and sushi in particular, you owe it to yourself to eat occasionally at proper sushi restaurants. Yes, Sushi Tei, Sakae and Itacho can be good to satisfy a craving on the cheap, but it's a far cry from what you can get from a Chef who's dedicated his entire life in the pursuit of fish-on-vinegared-rice perfection. In Singapore we do have quite a number of such restaurants; the best of which is probably Chef Kanesaka's Shinji by Kanesaka at Raffles Hotel. According to San Pellegrino & Acqua Panna's Asia's 50 best restaurants list, it's the best sushi restaurant in Asia (outside of Japan)!

Like many other fine dining restaurants, lunch is cheaper than dinner, with the starter/budget 9-piece Hana 花 option priced at $75. Is it worth the price tag? Let's find out!
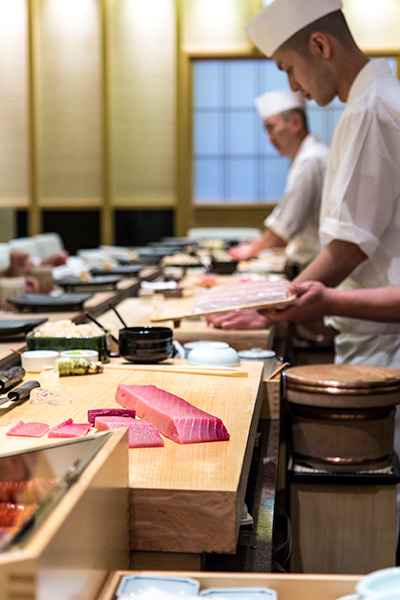
Shinji by Kanesaka Best Sushi in Singapore
Shinji by Kanesaka

Upon arrival we're ushered to our seats at the counter and we immediately draw favourable comparisons to another top sushi restaurant in Singapore - Les Amis Group's Aoki, which we visited about a month ago. Shinji by Kanesaka is a much more jovial place to eat in. The waitresses and chefs are far friendlier and as a result there's a lot more communication across the counter. And most importantly - even though we're on the cheapest menu option, each piece of sushi is formed and served one at a time - very important for a good sushi eating experience.
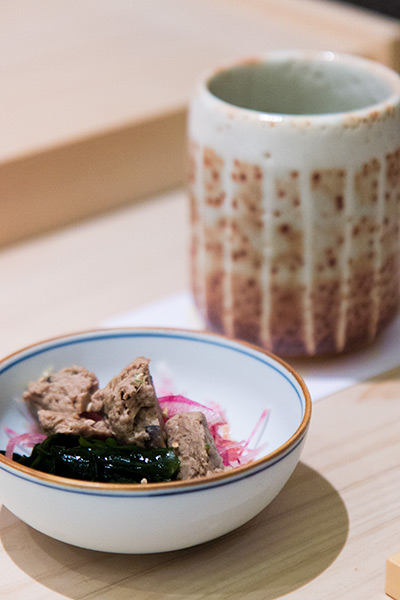
Shinji by Kanesaka Best Sushi in Singapore Appetizer
Appetizer - Tuna with pickled turnip & Seaweed

As is standard for restaurants of this calibre, you don't get to choose your sushi. The Chef may ask if you have any particular dislikes or allergies, but other than that you're at the mercy of whatever Master Chef Koichiro Oshino decides to serve. Or perhaps more accurately whatever his boss Chef Kanesaka over in Tokyo has deemed as the best fish and seafood for the day/season during their morning shopping sessions at the Tsukiji Fish Market. So all there is to do after ordering is to just sit back and wait :)

Shinji by Kanesaka Best Sushi in Singapore Sawara Spanish Mackerel
Sawara (Spanish Mackerel)

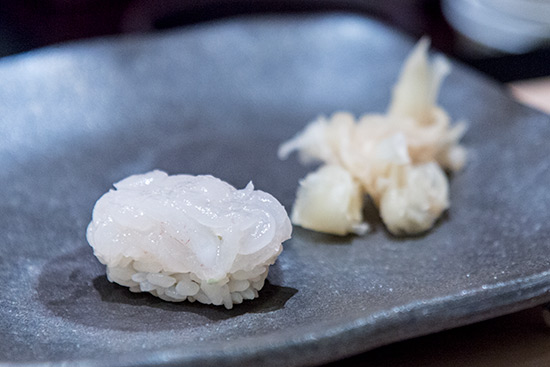
Shinji by Kanesaka Best Sushi in Singapore Baby Shrimp
Baby Shrimp

The appetizer that we got - chunks of tuna meat with pickled turnip and seaweed/kelp - was perhaps a little underwhelming. Nothing to fault taste-wise but not exactly particularly exciting, either. The sushi, however, was a different story entirely.

What we liked most about the sushi here is the shari (sushi rice). It comes at the perfect temperature, and is packed just tightly enough to hold it's shape from plate to mouth. Once the chewing starts the rice breaks apart, allowing you to taste and feel every single seasoned, slightly sweet, vinegared grain. Bliss.

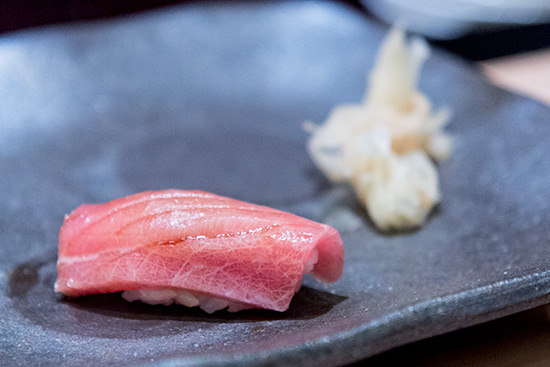
Shinji by Kanesaka Best Sushi in Singapore Chu Toro
Chu Toro (Medium Fatty Tuna)

Shinji by Kanesaka Best Sushi in Singapore Shimofuri Toro
Shimofuri O-toro

Similar to how there are huge differences in normal, every day beef and the best Wagyu or USDA Prime, likewise there are huge differences between different Tuna. Top Chefs will have the necessary money and decades-old relationships to get the best fish from the market - and by extension, the best slabs of Tuna Belly. Shinji by Kanesaka's ChuToro is sublime, with the best balance between flavor from the meat and oily richness from the fats, and with not even the slightest hint of tendon.

The Shimofuri O-Toro is so named because of the intricate marbling patterns that makes it look like Wagyu, and was equally heavenly.
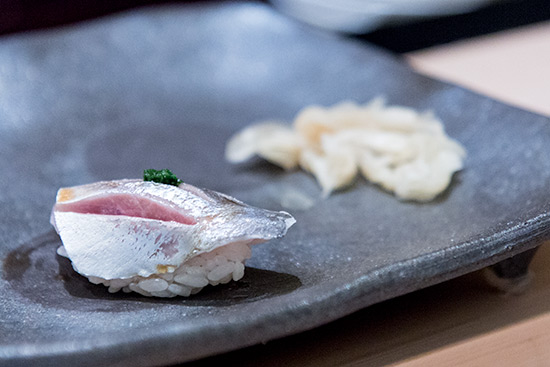
Shinji by Kanesaka Best Sushi in Singapore Aji Horse Mackerel
Aji (Horse Mackerel)

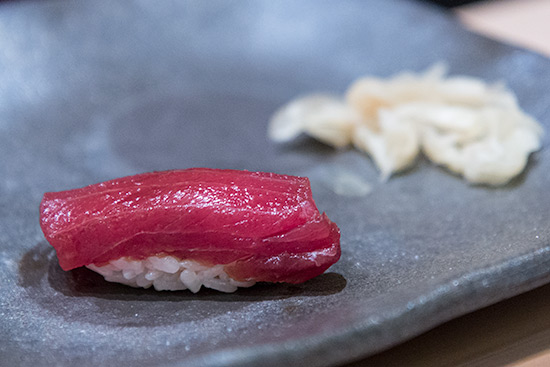
Shinji by Kanesaka Best Sushi in Singapore Akami Tuna
Akami (Tuna)

Shinji by Kanesaka Best Sushi in Singapore Baby Tuna
Six month old Baby Tuna

After these seven pieces of Sushi, we get a slight 'breather' in the form of Yuzu Marinated Ikura (Salmon Roe) on Rice. Most Ikura you eat at chain restaurants tend to be salty first and foremost. Not this Ikura. The saltiness is delicate rather than overpowering, and is tempered perfectly by the citrus from the Yuzu. Genius combination - all other Japanese restaurants should do this.
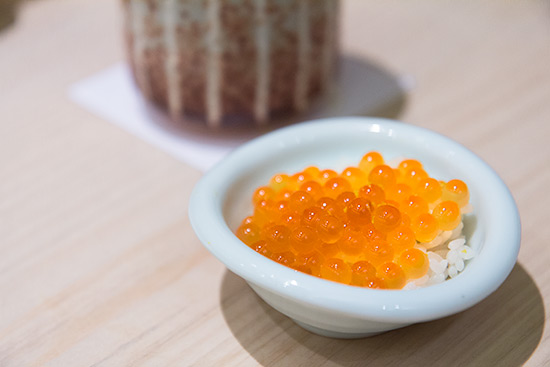
Shinji by Kanesaka Best Sushi in Singapore Yuzu Marinated Ikura Salmon Roe
Yuzu Marinated Ikura (Salmon Roe) on Rice

Shinji by Kanesaka Best Sushi in Singapore Kuruma Ebi Tiger Prawn
Kuruma Ebi (Tiger Prawn)

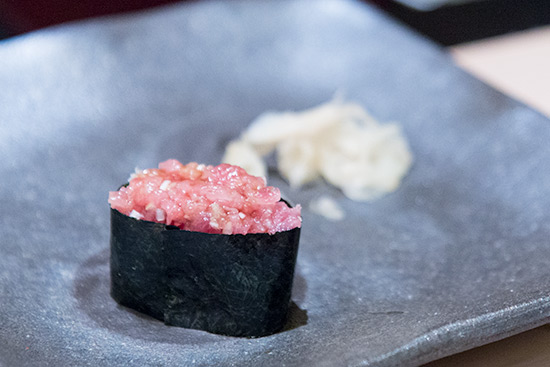
Shinji by Kanesaka Best Sushi in Singapore Gunkan Negi Toro
Negitoro (Minced Tuna Belly)

Shinji by Kanesaka Best Sushi in Singapore Salted Unagi Eel
Unagi Two Ways

The sushi journey then resumes with Tiger Prawn, Negitoro and Unagi nigiri. We thought it was a nice touch that Chef Koichiro cut the Tiger Prawn sushi for the darling as it would have been too big for her to eat in one bite. The unagi was interesting - we each got a 'traditional' sauce'ed up unagi, and a plain unagi with just a pinch of salt, which allowed for the flavors of the eel to take centre stage.

If you've been keeping count, we're actually already at ten nigiri plus an Ikura bowl so far. Didn't we order the 9-piece set? At this point we were hoping the waitress hadn't perhaps mixed up our orders ...
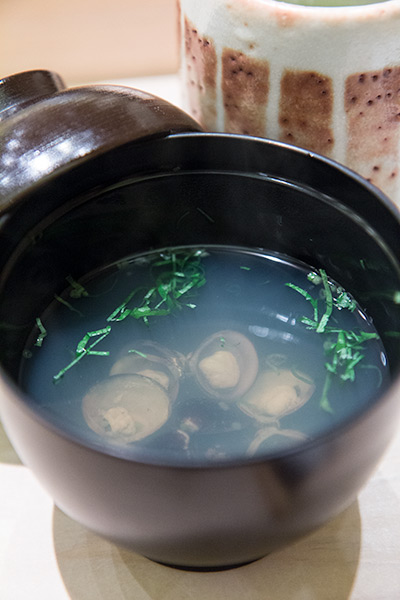
Shinji by Kanesaka Best Sushi in Singapore Clam Soup
Clear Clam Soup

Shinji by Kanesaka Best Sushi in Singapore Maki and Tamagoyaki
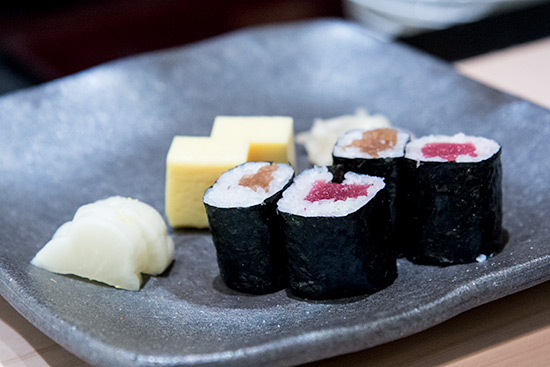
Akami and Negitoro Maki with Egg Custard Cake

A bowl of clear soup with mini clams is served to warm up the tummy followed by negitoro and akami maki, and two pieces of egg ... custard. The texture of the egg cake here is unlike any we've ever tried - it's silky smooth and has the consistency of a jelly. It's interestingly good. Normally we find it hard to get excited about the 'tummy filler' maki, but this one is delicious, in large part due to that superb rice.

The lunch set finishes off with a pumpkin pudding - essentially a creme brulee-based custard with sweet pumpkin puree. Delicious.
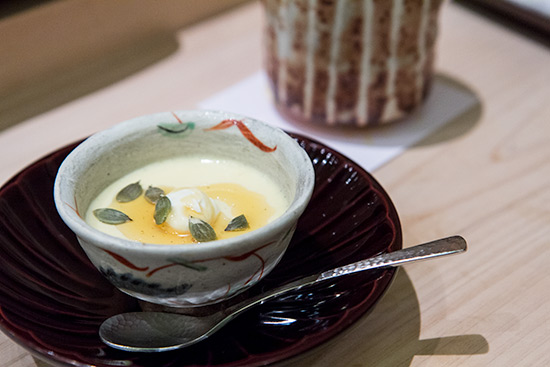
Shinji by Kanesaka Best Sushi in Singapore Pumpkin Pudding
Pumpkin Pudding

Verdict? Well, we haven't had the opportunity to sample any of the top ¥30,000 places in Tokyo, but otherwise this lunch simply blew us away, and is quite simply the best sushi meal we've ever eaten - even better than Tsukiji Market's Sushi Dai and Daiwa Sushi. We also feel that $75 is ridiculously good value when you consider the calibre of the chefs, the quality (and quantity) of the meal and that all the fish is flown in from Tokyo daily. Definitely extremely highly recommended.

Shinji by Kanesaka is at Raffles Hotel and is open from Mondays to Saturdays for Lunch and Dinner: Reservations highly reccomended: Telephone +65 6338 6131 or Email reservations@shinjibykanesaka.com

(We also had the $250 omakase shin for lunch, which adds on sashimi, cooked dishes and musk melon - we'll be reviewing that in a separate post as the huge price tag makes it a different value proposition)

Chocolate Ganache Frosting


Ingredients
1 cup / 230g Heavy Cream
Pinch of Salt
220g Chocolate (your preference)
1 teaspoon of Sugar
1 tablespoon / 14g of Butter

Step 1 Break the Chocolate into smaller cubes in a bowl.

Step 2 Bring the Heavy Cream, Salt, Sugar to a boil over low heat.

Step 3 Remove when it starts lightly boiling and pour over the chocolate.

Step 4 Stir to assist the melting and mix well until well combined.
Step 5 Add in the butter and mix until all melted. This will give you a glossy finish.

Step 6 Set aside until cool then place in the fridge until spreadable consistancy.


Assembling tips for Cake:
1. Ensure your baked cake is fully cool or better if chilled.
2. Take one piece and put on the cake board, scoop and spread the chocolate ganache evenly.
3. Place the second piece on top and press down firmly. Continue until all layers are stacked.
4. Place in the fridge to chill for an hour.
5. Froast the remaining chocolate ganache on top and work on the sides.
6. Clean up the little mess at the bottom of the cake board with kitchen towel.
7. Decorate the cake according to your artistic skills.
8. Place in the fridge until ready to serve.


Recipes that is topped with this Frosting:
Chocolate Fudge Cake with Dark Chocolate Ganache Coming Soon

I'm happy with my 1st cake froasting skill.

HAVE FUN & ENJOY!!!!!!

Overall Feedback: Not Sweet, Rich, Chocolate Delight.

Click here for our blog page Baking Classes for more recipes. Hope you will be inspired~

Monday, November 25, 2013

First Try on the 36 hour Sous Vide Porchetta.

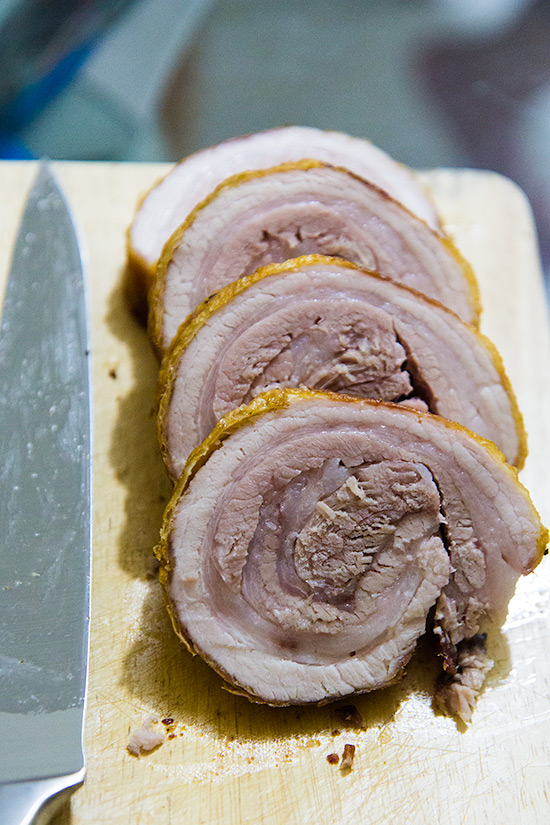
We've decided to skip the introduction and just go ahead with a photo of the finished product:

Delicious Sous Vide Porchetta

Now that we've hopefully gotten your attention, here's the breakdown! We use the word 'porchetta' liberally here, because traditionally and strictly speaking, Porchetta refers to gutting and deboning a whole pig, and then arranging it carefully with layers of stuffing, meat, fat, and skin, before finally rolling, spitting, and roasting (taken from Wikipedia).

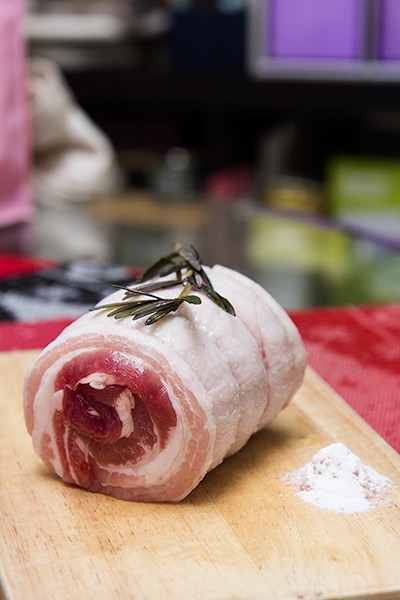
Obviously that's not something that the average home cook would probably undertake, so here we've gone ahead with 600 grams of Pork Belly, bought already rolled and tied up from the local Cold Storage and called that a Porchetta. As per the recipe on Serious Eats, we rub down the surface with a mixture of 1 tablespoon of crushed pink himalayan rock salt and 1/2 teaspoon of baking powder to break down the skin a bit during the cooking process.

Delicious Sous Vide Porchetta

From there it's into the zip lock bag and popped right into 68.3° water for what was supposed to be 36 hours. Unfortunately disaster struck here as somehow a sizeable amount of water (200ml or so, by my estimation) got into the bag after the first 10 hours. We replaced the bag but the same thing happened after the next 10 hours, so the poor meat was getting poached in water instead of its own juices. We have no idea what happened; our only guess is that the plastic (maybe the zip lock section) somehow become porous under heat. Any engineers or physicists care to weigh in?
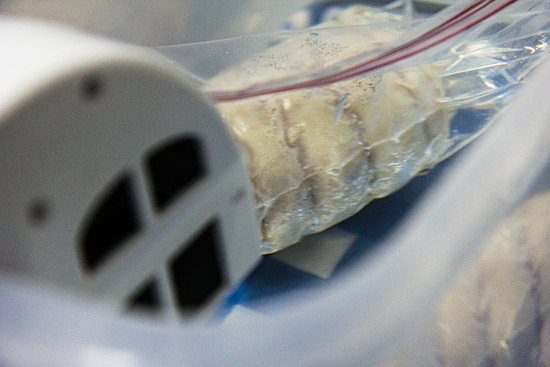
Delicious Sous Vide Porchetta

So because of that disaster we decided to cut the cooking time short, and soaked the roll into icy water - I guess it's for the same reason Hainanese Chicken Rice cooks also dunk their chickens in ice water. 10-15 minutes.

Delicious Sous Vide Porchetta

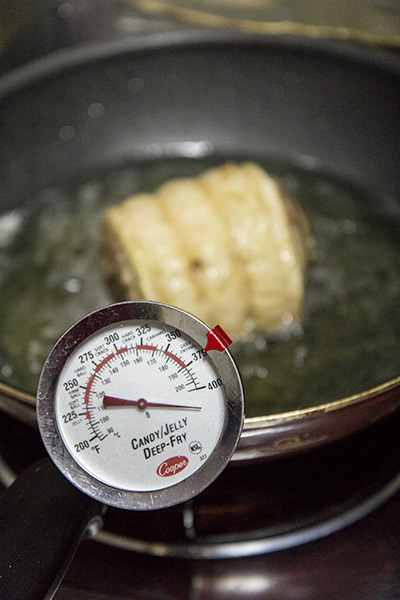
At this stage the pork is fully cooked, but you might agree that it looks rather anaemic and not that appetizing. So we dumped the now limp sprig of rosemary, and heated some oil to a little over 200°C ...

Delicious Sous Vide Porchetta

... and "deep fried" the Belly! Unfortunately we don't have a proper deep fryer (or enough oil to cover the entire 3 inches), so it was about 8 minutes of constantly rotating the Porchetta and ladle-ing 180-200°C hot oil over the top. And getting scalded in the process. Note to self: wear gloves around hot oil.

Delicious Sous Vide Porchetta

It was totally worth the effort though! The crisp skin crackles and encases and OH-SO-GORGEOUS amalgamation of meat and fat in the mouth. The flavor itself was a little weak, and we didn't have much in the way of natural juices thanks to all that water that got into the bag. Nevertheless texture wise it was perfect, and dare I say easily on par with the pork belly we tried at Gordon Ramsay's 1-michelin starred Petrus in Knightsbridge. I kid you not, it's that good.

Delicious Sous Vide Porchetta

Now if you're itching to try but don't have the gear, due to the long cooking time you really need at minimum a crock pot / rice pot with temperature controller (something like this setup). We've also learned from this episode that not all zip lock bags are created equal - we'll probably be investing in a set of proper sous vide bags and maybe a vacuum sealer before trying again.

So stay tuned for the second try once we get a little kitted up - now that we know the basic procedure works very well, we'll probably also be buying our own belly and shoulder/loin and rolling it by ourselves. Yummy!

Sunday, November 24, 2013

Part 3 of Premium Christmas Fruit Cake : Feeding Time for the Christmas Fruit Cake

Feeding time! This is the time where your cake gets indulge by the alcohol you're feeding and gives you a very moist Premium Fruit Cake.


Ingredients
Brandy / Whiskey / Rum (Reuse the marination leftover alcohol or fresh from bottle)
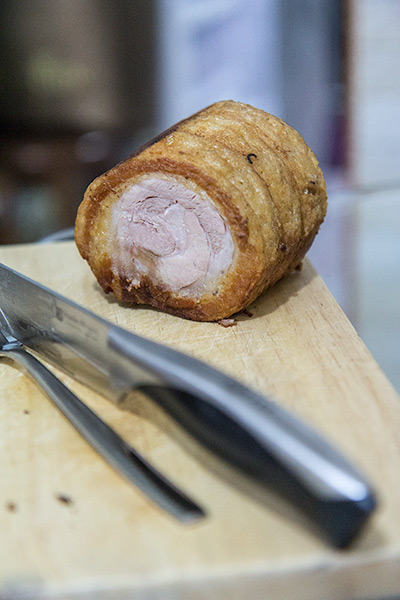
When the cake is totally cool, Place it in a air-tight container lined with parchment paper.

Prick the surface of the cake with a fine metal skewer.

Use a Syringe and measure up to 10ml to 20ml of alcohol for feeding. Repeat this every week up until Christmas.

The cake should be stored wrapped in greaseproof or parchment paper in an airtight container.

Our experience is there is a limitation of alcohol that the fruit cake can absorb. If you notice that your cake is not soaking up anymore stop feeding and let it age till Christmas.

Just before Christmas, remember to place a layer of fondant or mazapan and decorate it with some Christmas decoration to give it a Christmas feel. I'll post a picture of mine closer to Christmas.

Have to do your prep work of Part 1 process it's time: Step by Step Marination of Dried Fruits and Prepping the Baking Pan

Have to do your prep work of Part 2 process it's time: Baking the Christmas Fruit Cake

HAVE FUN & ENJOY!!!!!!

2nd Feeding after a week..

4th Feeding after a week..

After feeding and letting it age for few days. Optional is to roll a 3mm to 4mm thick Fondant or Mazipan and place on top of the cake. Decorate it with decorations. If you're transporting the cake overseas like us. Remember to wrap it up with kitchen wrap.


Click here for our blog page Baking Classes for more recipes. Hope you will be inspired~