Thursday, October 30, 2014

Fig Frangipane Tart Recipe

Got our hands on some Fresh Turkish Black Mission Figs, which are extremely sweet amd perfect for serving plain or with yogurt or tangy fresh cheese (mascapone, fromage, blanc, or farmers cheese) or dessert, It have blackish-purple skin and dark pink flesh.

Got them at SGD5 for 4 figs. Tried 4 figs plain and decided to bake this Fig Frangipane Tart to bring home for breakfast with my parents.

This recipe makes Two, 10" x 1" diameter tart


Tart Crust Recipe
115g Butter (softened)
70g Sugar
1 Egg
210g All-Purpose Flour
1/4 teaspoon Salt
Removable Bottom Tart Pan

Grease the tart pan with Butter. Cream Butter and Sugar until light and fluffy. Add the egg and beat until mixture is smooth. Add the Flour and Salt and mix well. Divide the mixture, then use your fingertips to press the dough into the tart pan. Prick all over of the base of the tart with a fork. Refrigerate for 30minutes. Pre-heat the oven to 180°C. Bake for 5mins to 10mins or until slightly golden. While it's baking prepare.......

Frangipane Filling Recipe
125g Butter (softened)
100g Sugar
2 teaspoons Vanilla Extract
2 Eggs
50g Ground Almonds
30g All-Purpose Flour

Cream Butter, Sugar, Vanilla Extract until light and fluffy. Add the eggs on at a time and beat until mixture is smooth. Add in the Ground Almonds & Flour and mix well. Spoon the mixture into the Tart Crust then spread even layer. Final step is.......

Garnish
4 large Figs or 8 small Figs (Remove the stems from the figs and cut them into wedges)
Honey
Sugar to Sprinkle (caramelization)

Arrange the Figs on top leaving some space between each fig. Sprinkle them with Sugar. squeeze some Honey on each fig. Bake in the oven for around 40mins to 50mins until it turns golden brown and a cake tester inserted in the centre comes out clean.

Serve it warm or cold. ENJOY!!!!!!

Some tips from us after our 1st attempt:
- Don't bake the tart crust too long, as the part 2 bake will make the tart curst brown and a crispier.
- Don't push the figs in to much as it will sink in as per our Fig Frangipane Tart outcome.


Click here for our blog page Baking Classes for more recipes. Hope you will be inspired~

Saturday, October 25, 2014

Fat-tastic Wagyu Donburi (Beef Bowl) at the Fat Cow!

Fat-tastic. Because the food was fantastic, and the restaurant is named Fat Cow, get it? OK, I suck at coming up with puns, so let's talk about the food instead!

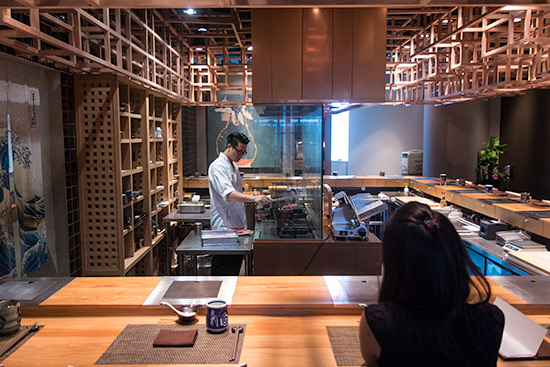
The restaurant's very Japanese-inspired main dining area has 17 counter-style seats surrounding the mini kitchen area where (i) All the meat is grilled, and (ii) All the sushi, sashimi and chirashi rice bowls are prepared. Steak and sushi seems like a rather odd combination; We'll find out if that combination works another day though as today we're here for the beef.

Wagyu Donburi Beef Bowl at the Fat Cow

Fat Cow is first and foremost a steakhouse - serving up a choice of Aussie/US Angus and Wagyu cuts alongside A3-A5 Japanese Black Cattle steaks from several different prefectures. Dinner prices are expectedly pricey with 300gm portions running up to well over $300 after service charge and taxes. But for the less well-heeled among us (i.e., yours truly), their set lunches are around the $30-$50 range and represent much better value!

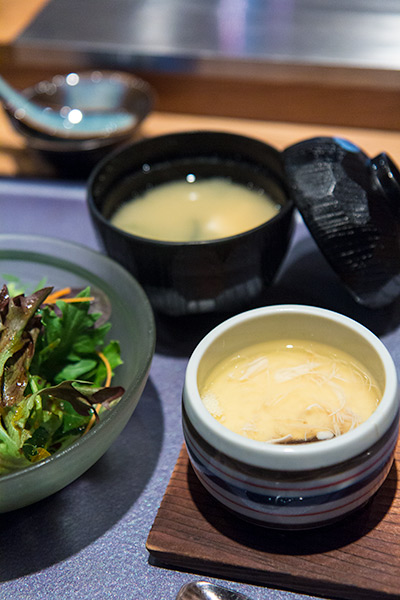
Each set lunch comes with an appetizer trio of salad (greens were fresh but the dressing was excessively sweet), miso soup (nothing too special) and scallop, crabmeat and prawn chawanmushi (served somewhat warm/lukewarm instead of piping hot like most other places).

Wagyu Donburi Beef Bowl at the Fat Cow

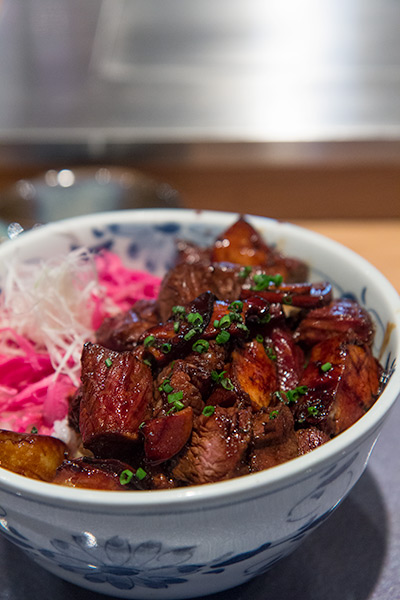
There are other choices ranging from chirashi (raw seafood over rice), curry, grilled miso cod and pork loin tonkatsu on the menu but we're only interested in the beef, starting off with The Fat Cow Wagyu Donburi ($39). This comes with a perfectly cooked onsen tamago and grilled-over-Japanese-binchotan-charcoal Wagyu strips over rice. The strips are delicious, with a wonderful aroma that characteristic taste of meat grilled over a hot charcoal fire. Of course they don't have that same melt-in-your-mouth, buttery goodness as A5 Kobe or other premium Japanese Wagyus; but at this price range it really is pretty damn good.

Wagyu Donburi Beef Bowl at the Fat Cow

The Fat-Foa Gura Don ($43) is next up: This rice bowl is topped with glazed, teppan (hot plate) wagyu beef with chunks of foie gras. Foie gras and beef, two ingredients that go oh-so-awesomely well together. Compared to the donburi you lose out on the chargrilled flavour but gain the creamy, buttery, fatty goodness of foie gras. Both are equally good, so order one of each and share :)

Wagyu Donburi Beef Bowl at the Fat Cow

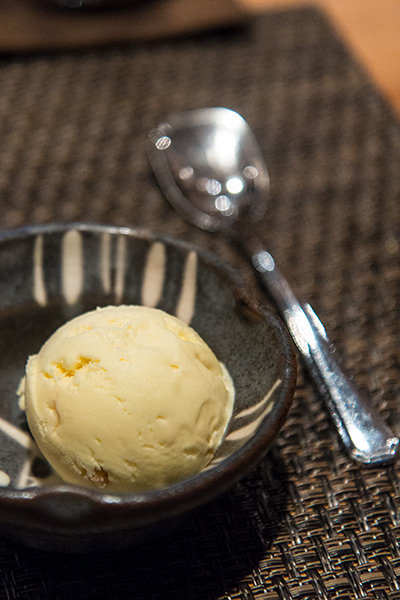
A scoop of ice cream rounds out the set lunch - today was honeycomb vanilla ice cream which was decent but not spectacular.

Wagyu Donburi Beef Bowl at the Fat Cow

So there you have it - gorgeous rice bowls for lunch at a top steakhouse at a relatively affordable price point. There are one or two petty niggles: the rice-to-meat ratio is skewed a little too heavily to the rice side, and hot green tea costs $5/person, but all things considered we'd highly recommended a visit if you're in the area.

Fat Cow is at Camden Medical Centre, about 1 km walk (or bus) from Ion Orchard. Reservations recommended. Non-halal.

Wednesday, October 22, 2014

Pomegranate Bundt Velvet Cake Recipe

Halloween is in a few days time. Just remembered some childhood scary nightmare where in a pool of blood with tons of eyes looking out for help!

Loading this picture to facebook and share with some of my friends on my creation and I have a mix votes of scary vs porn. Oh My! What do you think? Drop a comment before you tell me how you feel.

Also, one question we need help here!!! Anyone knows what kinda brand/country we can grab to get soft seed pomegranate?


Pink Velvet Recipe

Pre Mixed Dry Ingredients
180g Top Flour
1/2 teaspoon Baking Soda
1/2 teaspoon Fine Salt
1 teaspoon Baking Powder

For convenience, Place a plastic bag on your weighing machine to weigh the flour. Follow by adding all the other ingredients, twist the plastic bag to leaving a little air inside and give it a nice shake until it is evenly distributed.

Other Ingredients
58g Salted Butter
150g Fine Sugar
2 Eggs
170ml Buttermilk
1 teaspoon White Vinegar
1 teaspoon Vanilla Extract
0.5 teaspoon Red Food Colouring

Step 1 Line cupcake paper in cupcake moulds.
Step 2 Pre-heat oven at 180°C.
Step 3 Mix Buttermilk, Vanilla Extract and Red Food Colouring in a cup and mix until the colouring is disolved. Set aside.
Step 4 Cream the Salted Butter and Fine Sugar until all the Sugar dissolve.
Step 5 Add in one Egg at a time and mix well.
Step 6 Add in the Buttermilk mixture and mix well.
Step 7 Add White Vinegar and continue mixing.
Step 8 From here on, slowly fold in the Pre Mixed Dry Ingredients (splitting it to 3 parts) by hands. Beware not to overmix.
Step 9 Pour the batter in the Bundt Pan.
Step 10 Bake for approx 30mins to 40mins or when you insert the cake tester, when it come out clean then the cake is done.
Step 11 Leave it to cool in the tray for 15mins before removing to fully cool on a wire rack.


Covered with Whipped Fresh Cream Frosting Recipe & Tips. For recipe Click here!


Decorations
3 cups of Pomegranate
18 to 20 pairs of Homemade Chocolate Eyes
Cover the Pomegranate and look how pretty it is! Apologize It's my 1st time froasting whipped cream was told to put at least 1cm thick in between so it'll look much more prettier.


We love this recipe. It's a keeper.

HAVE FUN & ENJOY!!!!!!

Some tips from us after our 1st attempt:
- If possible find Soft Seed Pomegranate as it gets pretty annoying if the seends are hard and big.
- Volcano Top: Generally, the smaller the cake the higher the temp but shorter time, vice versa, the bigger the cake the lower the temp but longer time. How much longer or shorter depends on individual oven. If the big ones is baked after the small ones, the oven might be hotter than 180 degrees by the time the big ones were sent in.


Click here for our blog page Baking Classes for more recipes. Hope you will be inspired~

Whipped Fresh Cream Frosting Recipe & Tips


Ingredients
300ml of Thickened Cream
60g Icing Sugar (sifted)
1 teaspoon of Vanilla Extract
Stabalizer (0.5 teaspoon + 1 tablespoon Water)

Put all the ingredients in a chilled mixing bowl. Beat slowly at first until it starts to thicken then it can be raised.


Stages of cream as it is getting whipped.
1. Chantilly Cream - Barely thick and leaves trails in the cream but does not hold.

2. Soft Peak - The cream falls over when it's picked up by the whisk.

3. Stiff Peak - The cream can withstand piping and is the kind of texture to be use for froasting.

4. Over-Whipped - Butter forms and curdled.


Tips:
- If you have slightly over whipped, simply pour more 1/4 the amount you started with, reduce the speed to low to incorporate it and then increase speed to continue beating.
- If you overwhipped your cream, continue whipping until it all turn to butter and you can use it for other bakes.


Chocolate Whipped Fresh Cream Frosting Recipe
60g of Chocolate Coco Powder
- Sift Chocolate Coco Powder with Icing Sugar


Recipes that is topped with this Frosting:
Pomegranate Bundt Velvet Cake Coming Soon


Click here for our blog page Baking Classes for more recipes. Hope you will be inspired~

Saturday, October 18, 2014

Is this Product good?::: Tom Yum Noodles with Fish slices, Fishballs, Prawns (A Taste of Peace Brand)

Another good brand to introduce. It's not that spicy which is good for me..haha! However you can add additional chilli to boil or sambal to spice it up to your preference.


Recipe for 2

Ingredients
3 tablespoons of Tom Yum Paste (A Taste of Peace Brand)
2 small bowls of Water
6 Fishballs
250g of sliced Fish
6 Prawns
Spring Onion to use for garnishing
1 packet of Kuey Teow (pre-blenched)

Pre-blench the Kuey Teow and Portion into 2 bowls. Bring the Water to a boild and add in the Tom Yum Paste and stir until well desolved. Place the Fishballs in to cook until it float. Add in the Prawns and Fish and let it boil for approx 3 to 5min. Dish out and portion the ingredients in to the 2 bowls then pour the tom yum soup over and serve HOT!

Enjoy~


Click here for our blog page Cooking Classes for more recipes. Hope you will be inspired~

Thursday, October 16, 2014

Macadamia Chocolate Chips Cookie Recipe


Ingredients:
1 Egg
1.5 teaspoons of Coffee Emulco or Vanilla Essense
250g Salted Butter
200g Brown Sugar
0.5 teaspoon of Salt
100g Nestum or Ground Almond or Ground Oatmeal
290g All Purpose Flour
10g Baking Powder
10g Baking Soda
240g Chocolate Chips
1 cup of chopped Macadamia


Step By Step
1. Beat Egg with Coffee Emulco or Vanilla Essence in a small bowl and set aside.
2. Sift All Purpose Flour, Baking Powder, Baking Soda and set aside.
3. In a mixing bowl, beat Salted Butter, Brown Sugar & Salt until all the crystal melt and combine.
4. Pour in the beaten Egg mixture and mix well.
5. Pour in the Sifted Flour mixture and fold till well combine.
6. Pour in Nestum or Ground Almond and fold till well combine.
7. Pour in Chocolate Chips, Macadamia and fold till evenly distributed.
8. Place in the fridge to chill for minimum 2 hours to let the flavor infuse.
9. Preheat the oven to 180°C.
10. Roughly roll the cookie dough and place on the baking sheet.
11. Place in the oven to bake until golden brown.
12. Cool completely before serving.

Full recipe:
0.5 teaspoon of cookie dough yields approx 160pcs. Bake for about 8 minutes.
1 teaspoon of cookie dough yields approx 80pcs. Bake for about 16 minutes.
1 tablespoon of cookie dough yields approx 50pcs. Bake for about 22 minutes.

Some Extra Tips Below:
- Recommended to mix the dough and let it chill overnight in the fridge.
- Leave it on the counter top to bring it back to room tempreture before baking.
- You can store the mixed cookie dough (well wrapped) in the fridge for up to 3 to 5 days.
- If you're using a mixer, remember to do remove and manually fold in the Chocolate Chips and Macadamia.
- Remember space it slightly apart to let the cookie have space to brown evenly.
- To allow the flavour and fragrance to develop further, store cookies in an airtight container overnight before serving.


Click here for our blog page Baking Classes for more recipes. Hope you will be inspired~

Tuesday, October 14, 2014

Fancy Shinkansen/Space Shuttle/Train Conveyor Belt at Genki Sushi!

Quick mid-week video minipost! Finally got around visiting Genki Sushi to check out their fancy sushi delivery system. You place your orders on an iPad and instead of a waitress serving your sushi it zips right to you on a motorized shinkansen / space shuttle conveyor belt. Awesome sauce!


Sushi itself is pretty par for the course for conveyor belt sushi chains in this part of the world - that is to say, reasonably cheap ($2.30 for two salmon belly nigiri) but honestly not very good. But of course you get what you pay for, and it is pretty fun watching the shuttle arrive.

Genki Sushi has three outlets - Orchar Central, Chinatown Point and Bugis+. Non-Halal.

Sunday, October 12, 2014

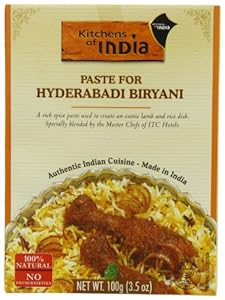
Is this Product good?::: Hyderabadi Chicken Biryani (Kitchen of India)

Our very 1st indian cruisine dish cooked up at home. Totally love this paste, flavorful, fragrant, and delicious. It's on the spicy side for me but just right for deary.

We got it from NTUC (Fairprice) Singapore and at the India Airport. Do leave a comment below where you got your paste from!


Below generally are the instructions behind the box. However, with some modifications we did due to lack of ingredients available in the supermarket.

Marination Ingredients
1 packet of Paste for Hyderabadi Biryani (inside the Kitchen of India)
2 Bonesless Chicken Maryland (slice each in 4 pieces)
1/3 cup Lemon Curd (we used 100g Plain Yogurt and half a Lemon Juice)

Mix the paste & Lemon Curd until well combine, place the chicken and make sure it's well coated. Marinate the Chicken overnight.

Rice Ingredients
1.5 cups of Basmati Rice
2.5 cups of Water
0.5 teaspoon of Sea Salt

Place all of this in your rice cooker and cook. If it's done keep warm. While the Rice is cooking. Time to prep the Chicken Briyani....

Other Ingredients
2 tablespoons of Ghee (Clarified Butter if not Butter will do)
Spice Pack (inside the Kitchen of India)
225ml Water

Heat up Ghee with Spice until aromatic. Add marinated Chicken and Water. Simmer for 30mins. Turn off the fire and keep aside.

When both Rice and Chicken is done. Loosen the rice and pour in the Chicken and sauce. Mix well and let it keep warm for another 15mins or until serving time.


Click here for our blog page Cooking Classes for more recipes. Hope you will be inspired~

Thursday, October 9, 2014

Hainanese Style Stir-fry Leftover Roast Pork Belly

Since Chef Tim is on his learning journey of making Crackling Roast Pork Belly, I've to come out with a way of handling the leftover Roast Pork Belly.

I was shown by mother-in-grace only once with her agak-agak a.k.a. approximation method of cooking which is not really my style. Failed once previously. However, this time around I pass! Better keep this as a record for my future reference.


Recipe for 2

Ingredients
1 tablespoon Vegetable Oil
3 cloves of Garlic, chopped
2 Shallots, chopped
0.25 tablespoon Sugar
250g leftover Roast Pork Belly, sliced thinly
1 tablepsoon Honey
50ml Chinese Rice Wine
0.5 tablespoon Light Soy Sauce
0.5 tablespoon Dark Soy Sauce
1 Red Chilli, sliced

Heat the pan and Oil to a high tempreture. Throw in the Garlic, Shallots, Sugar and stir fry until you notice slight caramelization. Toss in the Roast Pork Belly and give it a stir. Pour in the Honey, Chinese Rice Wine, Light Soy Sauce, Dark Soy Sauce. Toss frequently to get all the Roast Pork Belly coated. When the sauce is almost caramelized on to the Roast Pork Belly add in the Red Chilli.

Serve immediately. If not don't worry it still taste good when it's cool. So you can stir this up and work with the other dishes.

Enjoy~!!!


Click here for our blog page Cooking Classes for more recipes. Hope you will be inspired~

Wednesday, October 8, 2014

Stir Fry Thai Chilli Potato Luncheon Meat Sausage Recipe

This is one lazy dish that everyone can cook!


4 serving of Salad

Ingredients
2 tablespoon of Vegetable Oil
1 large Washed Potato, cubed
2 Sausages, cubed
1 slice of Luncheon Meat, cubed
2 tablespoons of Thai Chilli Sauce (can replace with Tomato Ketchup)

Heat Oil in a non-stick pan and fry Potatoes until the have slight golden brown crust. Add in the Sausages and Luncheon Meat. Toast it on and off to let it evenly cook. When it's almost done, pour in the Thai Chilli Sauce stir fry it and let it thicken up.

Enjoy~!!!

Click here for our blog page Cooking Classes for more recipes. Hope you will be inspired~

Monday, October 6, 2014

Breakfast Exploration ::: Kaya Butter Toast Set Recipe

Somehow, this is a traditional breakfast that we have been having since we were kids.


Recipe for 2

Soft Boiled Eggs
Ingredients
4 Eggs

Bring a pot of water. Place the Eggs in. Turn off the heat and leave the Eggs in for 7 minutes.


Crispy Kaya Butter Toast
Ingredients
4 Slices of Bread
Butter
Kaya

Preheat the oven at 160°C. Place the sliced bread lined up on a tray and let it bake until slightly golden. Remove from oven and spread thin layer of kaya on both slices of toasts. Then place thin slices of Butter on top of the toast then place the other half of the toast on top.


Mocha
Ingredients
2 Nespresso Capsules
1 teaspoon of Hershey Dark Chocolate Syrup

Pour 1/2 teaspoon of Hershey Dark Chocolate Syrup in to each cup. Pour in the warm formed milk. Then add the Nespresso (40ml). Stir and it is ready to be savor.


Click here for our blog page Breakfast, Desserts, & Snacks Ideas for more recipes. Hope you will be inspired~

Saturday, October 4, 2014

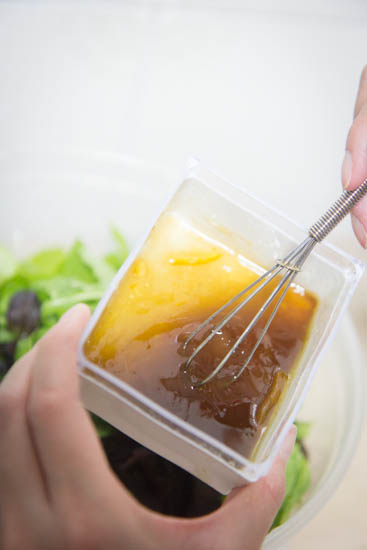
Honey Yuzu aka Citron Salad Dressing Recipe


4 serving of Salad

Ingredients
1 tablespoon Honey Yuzu / Honey Citron
0.5 tablespoon Soy Sauce
3 tablespoon Olive Oil


Mix all the ingredients well till combine! Pour and toss the salad well then serve.

We love it. Hope you will too! A very healthy dressing compare to cream base salad cream.

Enjoy~!!!

Click here for our blog page Cooking Classes for more recipes. Hope you will be inspired~

Wednesday, October 1, 2014

Sublime French Cuisine at L'Atelier de Joël Robuchon, RWS.

Chef Joël Robuchon - Chef of the Century by Guide Gault Millau in 1989; Holder of a world-record 28 Michelin Stars across his empire of restaurants around the globe. Two of these restaurants happen to be in Singapore's Resorts World Sentosa - the grander, more formal and more expensive Joël Robuchon Restaurant and the slightly less intimidating L'Atelier de Joël Robuchon.

L'atelier de Joel Robuchon
L'Atelier de Joël Robuchon

I totally love how a huge chunk of the dining area comprises bench-type seating in a horseshoe around the open kitchen. Being the foodies and amateur wannabe chefs that we are, there's something ... therapeutic, almost hypnotic about watching a world class kitchen at work. It's not too far from watching a live episode of Hell's Kitchen, actually. A far more civilised version without the swearing and manufactured TV drama.
L'atelier de Joel Robuchon
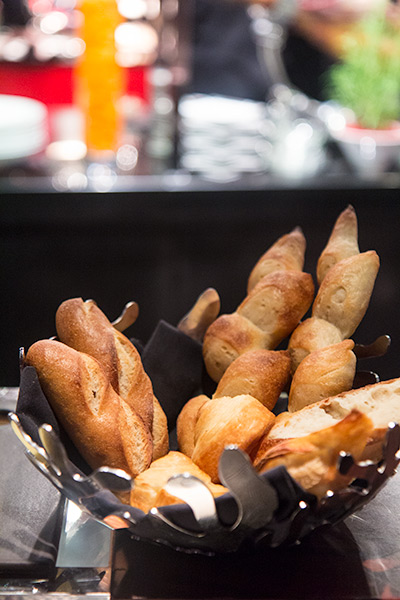
Bread Basket

For all the accolades and awards, Robuchon's bread basket here is curiously ordinary - nothing really worth mentioning.

The restaurant serves three variants of Set Menu at $68, $98 or $138, representing an increasing number of appetizers and main courses which you can order off the seasonally-changing menu. The darling goes for the $98 menu (2 appetizers, 1 main course), while I go for the more manly $138 (2 appetizers, 2 main courses).
L'atelier de Joel Robuchon
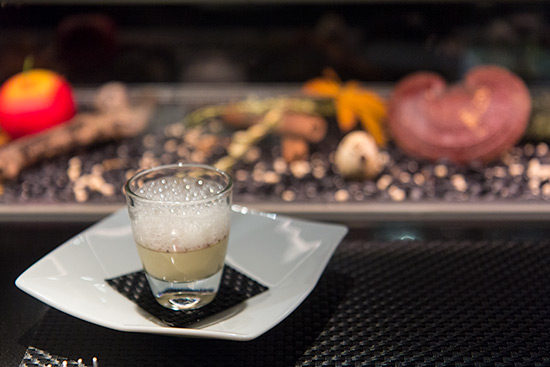
Amuse Bouche

Which bring us on to the Amuse bouche - foie gras custard with a balsamic reduction topped off with Parmesan Foam. Cheese and Duck Liver, who would've guessed they went so well together?
L'atelier de Joel Robuchon
L'Endive

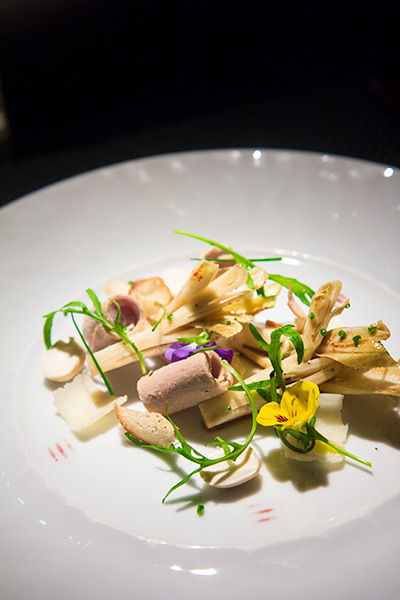
The first of our appetizers introduces us to a never-before-seen ingredient: a leafy vegetable called an endive. It's presented as a salad here with parmesan shavings, hazelnuts and foie gras pâté. Oh, and some edible flowers. The endive itself turns out to be a crunchy, tangy vegetable with a somewhat sweet aftertaste, matched perfectly by the savoury foei gras.

L'atelier de Joel Robuchon
Le Crabe

The layers of King Crab sandwiched between layers of turnip was a bit of a let down. We thought that the crab was lost and overpowered amidst the crunch of the turnip and the accompanying sweet and sour sauce. A double disappointment here considering the $15 supplement.
L'atelier de Joel Robuchon
La Grenouille

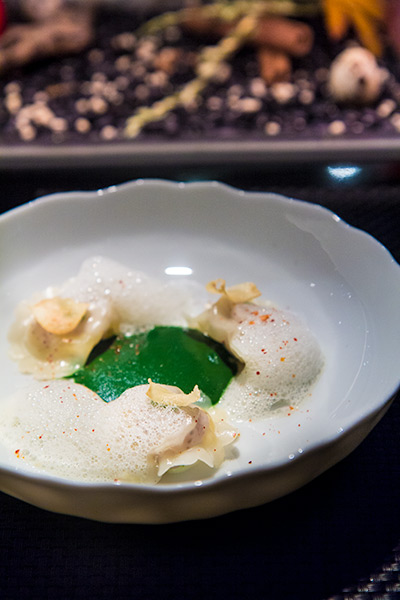
No such disappointment with the Frog Legs Ravioli - seasoning has been kept to a minimum here allowing the slight sweetness of the frog legs to maintain center stage. Gorgeous with the parsley sauce as well.

L'atelier de Joel Robuchon
Le Foie Gras de Canard

More foie gras follows! At a $17 supplement we would have hoped for 'proper' goose liver instead of duck; but to be honest it's prepared so well that we would have been hard pressed to tell the difference. If we had to nitpick perhaps a longer sear to get a more substantial crust would have been great. Oh, and a spoon to mop up that gravy with the Paimpol beans.

L'atelier de Joel Robuchon
Le Saumon

Onwards to the main courses! The salmon was cooked a perfect, juicy medium rare, and was delicious with the accompanying sweetness from maple syrup - tempered with that mustardy goodness from wasabi. The crispy skin was served on the side with another portion of endive salad.

L'atelier de Joel Robuchon
Le Vivanneau

The second fish course - Pan seared Snapper with baby leeks and lemongrass. Juicy, succulent flesh with an oh-so-crispy skin. One day I will teach myself how to cook fish this well.

L'atelier de Joel Robuchon
Le Coquelet

The Spatchcock Chicken took top honours as our favorite dish of the night, though. "Spatchcock" is a method where the chicken is split along the backbone and skewered before cooking. In this dish the technique is used on a coquelet - a young or baby chicken - and is uber delicious on its' own. The addition of that superbly umami gravy and pairing of a bolognese-flavored ratatouille makes it all the more perfect.
L'atelier de Joel Robuchon
Robuchon's Mashed Potatoes

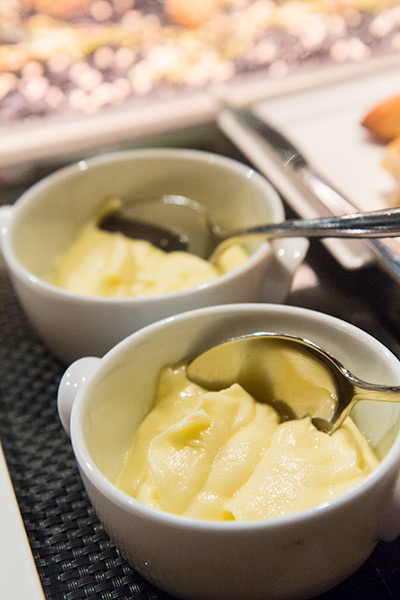
The main courses are also served with a helping of Robuchon's Mashed Potates - very rich (with liberal dosages of butter and milk), very smooth (achieved by running the mashed potatoes multiple times through a fine sieve).

L'atelier de Joel Robuchon
La Creme Brulee

Today's Creme Brulee comes with tangy passion fruit and sweet berries. And a small edible flower. How do you know which flowers are edible and which aren't?

L'atelier de Joel Robuchon
Le Multivitamine

And our other dessert - Red berries spiced coulis on Victoria pineapple sorbet. Topped off with popping candy as is all the rage in desserts these days.

L'atelier de Joel Robuchon
Coffee, tea and madeleines

Overall we thoroughly enjoyed our dinner very, very much. The restaurant isn't perfect - we thought the maître d's sour demeanour and constant pacing up and down the dining area was somewhat intimidating; and our wait staff weren't as knowledgeable about the menu as we would have expected in an establishment of this level. Nevertheless barring the crabby appetizer, the food was amazing and pacing of service was perfect. Non stop entertainment provided courtesy of observing the kitchen at work, too! Total bill came up to $313 for two people which is pricey but in our opinion quite worth the money. If you're interested to splurge on the best the restaurant has to offer there's also a degustation at $240.

L'Atelier is open for dinner only on Thursday to Monday (closed Tues and Thurs). Reservations recommended at Robuchon@RWSentosa.com. Non-halal.