Sunday, September 29, 2013

Dessert Exploration::: Japanese Konnyaku Grape Jelly with Fresh Peeled Seedless Grapes


Ingredients
Japanese Konnyaku Grape Jelly (Picture shown below)
500ml of Boiling Water
1 small bowl of Fresh Peeled Purple Seedless Grapes
Alluminium moulds/Silicon/Plastic cups
Thermometer
While the water is boiling, sort out the Fresh Peeled Purple Seedless Grapes into the Alluminium moulds/Silicon/Plastic cups.

Pour the water in a bowl, place the thermometer and check if the water is above 90ºC, when is pour in the Japanese Konnyaku Grape Jelly powder...
...stir until all dissolve.
Distribute the apanese Konnyaku Grape Jelly mixture into the Alluminium moulds/Silicon/Plastic cups. If there are bubbles remember to break them for a smooth finish.
Put all the filled cups into the fridge to chill and you'll get to eat Japanese Peach Jelly soon!

Enjoy~

Click here for our blog page Desserts & Drinks for more recipes. Hope you will be inspired~

Friday, September 27, 2013

Sweet & Sour Fish (Yellowtail Fusilier)


Deep Fried Yellowtail Fusilier Fish Ingredients
500g of Yellowtail Fusilier Fish
2 cups of Cooking Oil

Wash and pat dry and score the Yellowtail Fusilier Fish. Heat up Cooking Oil in pan, it's hot enough when you put in your chopstick and it bubbles. Put in the fish and fry until both sides crisp up and turn golden brown. Drain on a few layers of kitchen towel and place it on a serving dish.

Sweet & Sour Sauce Ingredients
1/2 cup of Halfed Cherry Tomatoes
1/2 cup of cubed Cucumber
1/2 cup of Tomato Sauce
1 tablespoon of Thai Chilli Sauce
1 teaspoon of Corn Flour mixed with 3 tablespoon of Filtered Water
1 teaspoon of Sugar

Throw in the Cherry Tomatoes and stir fry it till the skin wrinkle up slightly. Add in the Tomato Sauce, Thai Chilli Sauce, Sugar, and Cucumber. When the sides start bubbling, pour in the Mixed Corn Flour with Water. Simmer down until the thickness is sauce like. Pour over the Deep Fried Yellowtail Fusilier Fish.

It's ready to be serve!


Click here for our blog page Cooking Classes for more recipes. Hope you will be inspired~

Thursday, September 26, 2013

Dessert Exploration ::: Ginkgo Nuts + Barley + Fu Chok (白果薏米)


Ingredients
100g of Candied Winter Melon
1/2 cup of Barley
8 to 10 Gingko Nuts
1/4 packet of Dried Bean Curd Skin (pre-soaked to soften)
1L of Filtered Water

Step 1 Wash the Barley thoroughly and boil it for 20mins. While it's boiling break up the pre-soaked Dried Bean Curd Skin.
Step 2 Put in the Candied Winter Melon and Gingko Nuts and boil for another 20-30mins until everything is soft.
Step 3 Preferably served hot. However it can be served chilled too!


Deary mentioned that prefer Big Chunky Candied Winter Melon will not slice then up the next round.

Enjoy~

Click here for our blog page Desserts & Drinks for more recipes. Hope you will be inspired~

Monday, September 23, 2013

Oven Broil Saba Fish - Extremely easy and hassle free


Broiling is where you cook by exposing your meat or fish at a very high intense heat from the top.

Ingredients
2 halved Saba Fish (for 2 person)
Canola Oil Spray
Salt
Black Pepper

Step 1 Pre-heat oven to 200°C, Top funtion only. Works well too if you have a toaster that can turn the switch to the top only function.
Step 2 Wash, pat dry, and score the saba fish.
Step 3 Place on alluminium Foil (for easy washing) then Salt & Pepper the skin side.
Step 4 Place it in the oven to broil for about 10 minutes, or until the skin starts to brown & crisp.
Step 5 Dish it into a Japanese Plate.

It's ready to be serve!


Click here for our blog page Cooking Classes for more recipes. Hope you will be inspired~

Sunday, September 22, 2013

Chawanmushi with Chicken, Ginko Nuts, and Shiitake Mushroom


Ingredients
2 Chawanmushi Cups
2 Eggs
320ml of Filtered Water / Dashi Stock / Chicken Stock
2 tablespoons Soya Sauce
1 tablespoon Mirim / Chinese Rice Wine
6 pieces of cooked diced Chicken
2-3 Ginko Nuts
1/2 sliced Shiitake Mushroom
Water for steaming

Chawanmushi Egg Mixture Steps
Step 1 Fill a steamer with water and put it to boil. Note that the cups should 2" above the boiling water.
Step 2 Break eggs into a bowl and stir it gently in a cutting motion to avoid bubbles from forming. Stir till well-mixed.
Step 3 Gradually stir the Filtered Water / Dashi Stock / Chicken Stock into the eggs.
Step 4 Add Soya Sauce and Mirim / Chinese Rice Wine and stir till well-mixed.

Assembling and Steaming Steps
Step 1 Arrange the Chicken, Ginko Nuts, & Shiitake Mushroom in the Chawanmushi Cups.
Step 2 Fill the Chawanmushi Cups with 3/4 full of the Chawanmushi Egg Mixture.
Step 3 Place in the steamer and cover the Chawanmushi Cups.
Step 4 Steam on high heat for 2 minutes then off the fire to let the egg set.
Step 5 Continue steaming for anything 5 minutes on low heat then off the fire to let the egg set. This is to prevent over cooking. Repeat one more time or until the top middle is not watery.
Step 6 Remove chawanmushi cups from the steamer and set aside to cool for 2 minutes before serving.

Tips: Do not beat the mixture. For a smooth beancurd-like texture and no bubbles too, use the cutting motion while you stir gently.

It's ready to be serve!


Click here for our blog page Cooking Classes for more recipes. Hope you will be inspired~

Stir Fry Exploration ::: French Beans with Baby Corn


Ingredients
300g of French Beans
50g of Baby Corn
5 cloves of diced Garlic
2 tablespoons of Cooking Oil
2 tablespoons of Filtered Water (to create steam to cook bean when covered)
1 tablespoon of Oyster Sauce

1. To prep Wash the French Beans & Baby Corn and and slice them up then set aside.
2. In a pan, heat the oil add in the diced Garlic and stir-fry until very lightly browned.
3. Put in the French Beans and stir-fry until it turn dark green, then add in the Baby Corn & Filtered Water. Keep it cover for the steam to cook, on off open and stir.
4. Add in the Oyster Sauce, stir fry for a while more. The beans should be just a little crispy. Dish it into a plate.

It's ready to be serve!

Click here for our blog page Cooking Classes for more recipes. Hope you will be inspired~

Friday, September 20, 2013

Upside Down Blueberries Sponge Cake

Just got my hands on a box of Fresh Blueberries from the Fruit Bazaar in office, which suddenly triggered my mind to twist the traditional Sponge Cake recipe into an elegant one.


Base Sponge Cake Ingredients
250 Premix Sponge Flour
4 Eggs
50ml Water
50ml Vegetable Oil
1 teaspoon of Vanilla

Whisk together the Premix Sponge Flour, Eggs, Water and Vegetable Oil on high speed for 8 minutes. Place in the oven to bake at 160ºC for 15 to 20 minutes. Use a cake tester stick or wooden stick to check, if it pulls out clear it's done!

Cool in the tray for 10 to 15 minutes, then remove from tray to totally cool.

*** *** *** *** *** *** *** *** *** *** ***

Fresh Blueberries.

Arrange the Blueberries according to your liking.

I was trying out a new fun way that is to arrange C for Cindy as a birthday cake present for her and her family.

Warning as different blueberries burst differently my C became like K, which i had to use butter cream just for the top of the cake to make it look like C all over again.

This is fun if you wanna twist your favorite traditional sponge cake into something different.

Our friend comments on the cake is "Your Blueberries Sponge Cake is very nice. Texture and Sweetness perfect. Excellent."


Have Fun~~

Click here for our blog page Baking Classes for more recipes. Hope you will be inspired~

Thursday, September 19, 2013

Blanching Exploration ::: Crispy Baby Bok Choy 小白菜 with Minced Chicken


Ingredients
2 handful of Baby Bok Choy 小白菜
3 tablespoons of Onion Oil
1 teaspoon of cooking oil (for blanching)
2 tablespoon of cooking oil (for stir-frying minched chicken)
100g Minced Chicken
1/2 tablespoon Shao Hsing Hua Diao Wine (紹興花雕酒)
1 teaspoon Dark Caramel Soya Sauce
salt & pepper to taste

1. Wash the Baby Bok Choy and soak it in filtered water for 15mins. As taught by elders this is to freshen up the vegetables.
2. Boil half a pot of Filter Water. Add in Salt & Cooking Oil.
3. Put in the Baby Bok Choy and let it blanch till it all turns bright green then should be immediately scoop it out and drain.
4. It can be immediately placed in a dishing plate, drizzle Onion Oil over the blanched Baby Bok Choy 小白菜.
5. In a pan, heat the oil and stir fry the chicken until all turn pale white. Then add in the Shao Hsing Hua Diao Wine (紹興花雕酒)& salt & pepper to taste.
6. Lastly, Dark Caramel Soya Sauce to add some color. Dish on top of the blanched Baby Bok Choy 小白菜, sprinkle some spring onion for decoration.

It's ready to be serve!


Click here for our blog page Cooking Classes for more recipes. Hope you will be inspired~

Monday, September 16, 2013

Cooking the Perfect Steak - Sous Vide then Sear Method

We're back to our Steak cooking exploration! Once again it's worth mentioning our prime motivation ... money! Above all else the #1 determinant for how good a steak will be is how good the meat is in the first place - and good meat doesn't come cheap. Hence the best steakhouses always charge top dollar, and the cheap steakhouses like Aston's almost always suck. So if you're looking to eat quality steak on a budget, cook it yourself at home!

Two weeks ago we blogged about the Freezer then Low Temperature Oven method. Today we're going to try the latest rage - Sous Vide. Sous Vide is literally French for "under vacuum," but in a culinary setting it means sealing your food in a bag and then slow cooking it in a water bath at a set temperature such that it cooks slowly and evenly. We decide to use the SideKIC Kitchen Immersion Circulator, which is a compromise between a full blown home sous vide solution (like the Sous Vide Supreme) and ghetto hacking one out of a rice cooker or a cooler box.

Perfect Steak Sous Vide

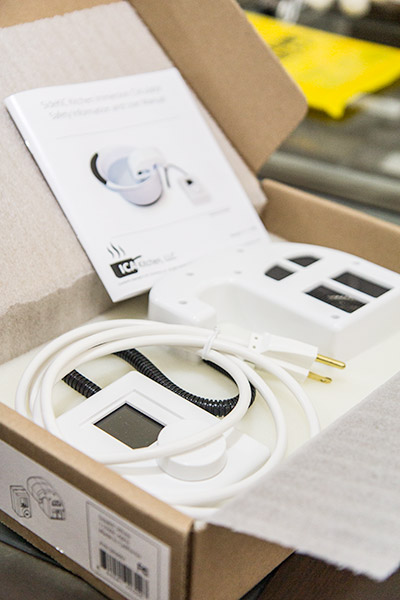
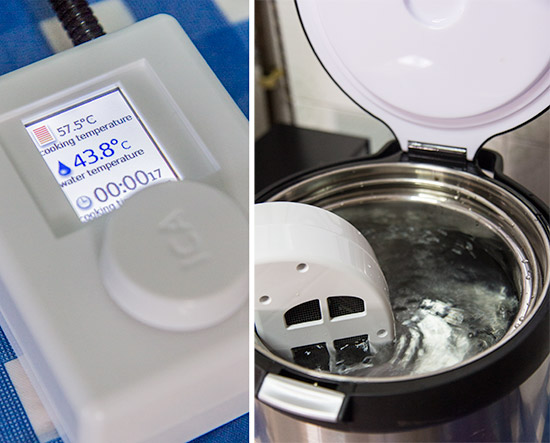
The SideKIC comes in two parts - a combined 300watt heater element and circulator, and an external temperature controller. You can see here that the circulator does quite a nice job of getting the water moving around the container. 300 watts is not a lot of power, though, so you'd be better off pre-heating the water using a kettle or something.

Perfect Steak Sous Vide

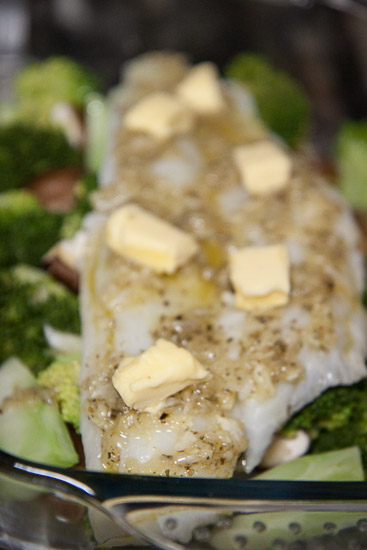
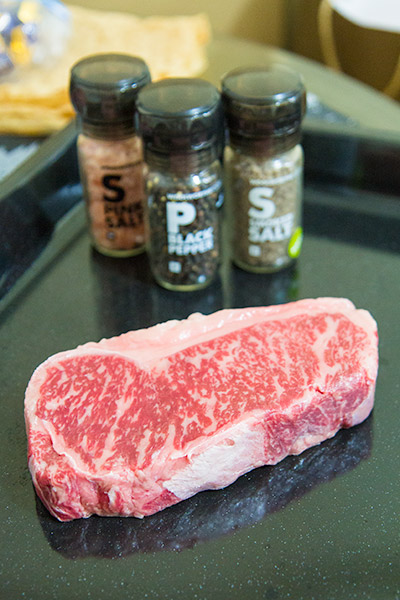
Our meat of choice tonight is an Aussie Wagyu Striploin - gorgeously marbled and a full one-and-a-half inches thick. With a little sprinkling of smoked salt, pink himalayan salt, and loads of freshly cracked black pepper.

Perfect Steak Sous Vide

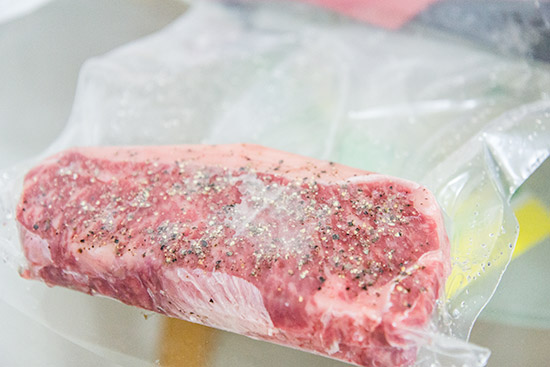
Into the ziplock bag! In keeping with the theme of being somewhat budget, we didn't buy a vacuum sealer. Instead we simply used water displacement (i.e. you dip the steak and the bag gradually into a container full of water, and the water pushes the air out. Yes yes you don't really get a vacuum, but it's close enough that it doesn't really matter.

Perfect Steak Sous Vide

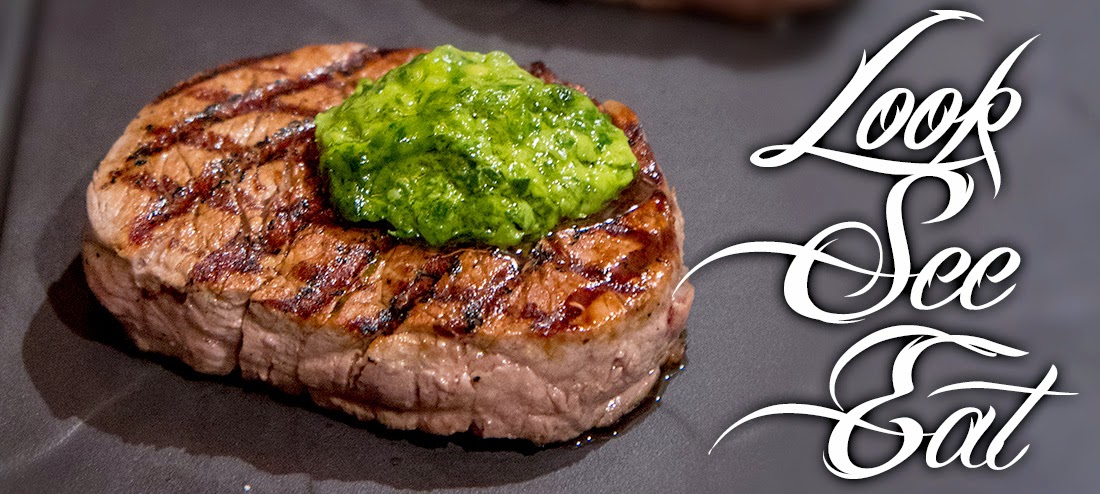
Into the water the steak goes! Fast forward about an hour later and it's done! At this point the steak is entirely evenly cooked perfectly the way you want it (we had ours at 56 degrees Celcius for Medium Rare). You could eat it right now and it would be pretty delicious. But to make it even better, you just have to sear it to get that nice Maillard reaction going on the crust. Blowtorch or Pan Sear as how you like it, and then serve!

Perfect Steak Sous Vide

With the sear, the steak just becomes more fragrant, more aromatic, and looks a whole lot better too - wouldn't you agree?

Perfect Steak Sous Vide

And of course, slicing the steak in half shows you just how evenly the meat is cooked. Unlike regular steak cooking methods (and particularly for thicker cuts), a 'medium rare' steak really means only the middle is medium rare, gradually going to medium - medium well and well done on the outer layer. With the sous vide and other slow cooking methods, the steak is medium rare the entire way through. Juicy, fatty, yummy, absolutely delicious!

Perfect Steak Sous Vide

For Sous Vide, Medium Rare is the best way to go (cooked to 55-56 deg C). Because of the low cooking temperature, the intramuscular fats don't quite render if you cook it to rare. If you really must have your meat a little less pink, Medium is about 60 deg C and Medium Well is about 64-65 deg C.

Now, Sous Vide doesn't magically make your steak 10 times better. Don't expect it to be better than Morton's or Cut or The Fat Cow. What you do get, though, is brainless, zero-skill required, perfectly cooked meat. Every single time. Because the steak's temperature will never go above whatever temperature the water is at, it is impossible to overcook it even if your dinner gets delayed by a couple of hours.

Of course the main drawback is the (relatively) lengthy cooking time - at least an hour, so it's perhaps not the best if you're home late from work and just want a quick dinner. But if you've got a bit of time to put in, the 'dunk and forget' and sheer consistency of cooking in a water bath means this is perhaps the perfect way for the home chef to cook steak.

Note: We have an additional SideKIC Kitchen Immersion Circulator available for sale. If you're interested do drop an email at shuigao(at)gmail(dot)com. Singapore, JB and KL only.

Click here for our blog page Cooking Classes for more recipes. Hope you will be inspired~

Tasty Butterscotch Croutons for any soup topping

The reason why our Croutons post is Butterscotch. Is because we love Butterscotch Croutons because it gives a sweet flavor, you can use Plain slice bread, Raisin sliced bread, etc of your liking. Hope this little tip works well in your kitchen.


Ingredient
2 slices of Butterscotch Bread

Pre-heat the oven to 140°C.

Diced up the croutons and scatter it into a baking pan.

Let it bake until it turns golden brown.

Dish it into a small bowl for your family or guest to pour into their soup. The longest we stored in a air-tight container is less then 1 week. Of coz freshly baked up is always the best!

Click here for our blog page Cooking Classes for more recipes. Hope you will be inspired~

Saturday, September 14, 2013

Baked Halibut Fish on top of Broccoli and Shiitake Mushroom


A friend of mine in office, keep insisted me to try this recipe of hers. She promoted to me as easy to prepare less hassle, ,very delicious and healthy. After a long while of our fridge to clear off our cooking supply, we got hold of a Halibut Fish Fillet and here is the recipe of our wonderfully healthy dinner.

Sauce Ingredients
1 whole peel Garlic
4 tablespoons of Olive Oil
1 teaspoon of Dry Italian Herbs
Dash of Salt

Step 1 Peel and pound up the Garlic.
Step 2 Add in the Olive Oil, Dry Italian Herbs and Salt and be gentle and slowly pound it.
Step 3 Set aside to be used later.


Ingredients
1 Halibut Fish Fillet
1 whole cut up blenched Broccoli (you can add traffic light Capsicum to make it more colorful)
8 Shiitake Mushrooms
1 thick slice of Butter
1/2 Lemon for serving (optional)

Step 1 Put a pot of water to boil and place in the cut up the Broccoli for blenching. Meanwhile quarter the Shiitake Mushrooms.
Step 2 Pre-heat the oven to 180°C. Arrange the Shiitake Mushroom in the baking pan.
Step 3 When the Broccoli turns bright green arrange them in the pan like the Shiitake Mushrooms.
Step 4 Place the Halibut Fish Fillet on top.
Step 5 Spread the Sauce mixed prepared earlier over the whole fish and if there is extra pour it on the Broccoli & Shiitake Mushrooms.
Step 6 Lastly, a few slices of butter over the fish.
Step 7 Bake for about 25 to 30mins. Serve immediately with a few Lemon Wedges.

Click here for our blog page Cooking Classes for more recipes. Hope you will be inspired~

Fully Baked Potatoes with Bacon


Ingredients
4 Washed Potatoes (Chunky) or 2 US Russle Potatoes (Soft & Sandy)
5 Streaky Bacon
1 tablespoon of Light Sour Cream
Conola Oil Spray

1. Pre-heat oven to 220°C.
2. Prepare your potatoes, by slicing the potatoes deep enough to place the bacon inside.
3. Cut up the bacon according to the length of your potatoes cut size.
4. Stuff in the bacon for every cut you done.
5. Spray Canola Oil on the baking pan, place in the potatoes, and spray some on top again before putting it into the oven for about an hour.
6. Bake until the potatoes is baked by checking using a cake tester/ stick/ knife. If it can be easily poke in & out the potato is fully cooked.


We'll explore more baked potatoes recipe and ways to cut short the baking time. Stay Tune!

Click here for our blog page Cooking Classes for more recipes. Hope you will be inspired~

Tuesday, September 10, 2013

Okinawan Cuisine at Nirai Kanai, Liang Court

Okinawa is Japan's southern-most province spanning hundreds of islands. What's interesting is that because Okinawa descends from the Ryukyu Kingdom, it's got a different history, different culture and even a slightly different language/dialect/accent than the rest of Japan. If you're interested, you can visit the Wikipedia page on the Ryukyu Kingdoms. For our purposes, though, we're primarily interested in the differences in the food!

Nirai Kanai Okinawan Restaurant

We head down to the basement of Liang Court to try out the nosh served at Nirai Kanai Okinawan Restaurant. Glancing at the menu, it feels remarkably like a Chinese-style "rice and dishes" menu where you order a few dishes to share among the table. Japanese stalwarts like Ramen and Stewed Pork are available, as are Okinawa specialities like thin pancakes and deep fried pork knuckle.

Although the restaurant serves free-flow hitomebore shortgrain rice, we decide to go easy on the carbs and instead go for Jyuushi Onigiri (Okinawan Seasoned Rice Ball, $6 for a pair). It's cooked in mushroom broth with liberal amounts of kale, pork, carrots and mushrooms. Pretty delicious and is actually flavored well enough to stand on its' own!

Nirai Kanai Okinawan Restaurant Onigiri Rice Balls

A bowl of Aasa Jiru (Aosa Seaweed Soup with Tofu, $10) is up next! You get about 4 small bowls of dashi-based, seaweed soup from this big bowl. The Aosa seaweed was nice - wasn't too soggy nor too firm to be slurped up in the soup. Naturally it's a clear, light-tasting broth so if you're looking for strong, creamy angmoh style soups, better try something else.

Nirai Kanai Okinawan Restaurant Seaweed Soup

Typically stewed/simmered pork like what's in our next dish is called Buta Kakuni; here it's called Rafutee. It's $13.80 for four large slices of simmered flavored pork belly in a wonderfully umami gravy. It's delicious, the belly isn't too fatty and the dish is served with some veg on the side - what's not to love? Well, if we had to nitpick perhaps some parts of the meat were a tad bit dry, but we wouldn't hesitate in recommending this dish regardless.

Nirai Kanai Okinawan Restaurant Buta Kakuni Stewed Pork

Sooki also comes in two sizes - $10 and $6. The $6 portion pictured here comes as two portions of grilled pork rib with soft bones, served with lemon and salt on the side. You know, that cut of rib that comes with the chewable, edible bones. Here it's grilled until the soft bones are ... melting (for lack of a better word). It's a little alien chewing on warm melted cartilage and perhaps wouldn't be everyone's cup of tea.

Nirai Kanai Okinawan Restaurant Grilled Pork Ribs

At about $20-$40 per person, food's hearty and delicious and is decently priced, too. We'd definitely recommend coming here for the Japanese and yet not quite Japanese experience. Don't worry about reservations as there's typically little or no queue even on peak times. Open for Lunch and Dinner everyday. Non-halal.